Ceiling fan remotes provide functionality as well as convenience. While having to walk to the fan or wall switch whenever you need to turn it on or off or adjust the speed is not going to exhaust you, in this age of modern convenience, if we can make it easier, then why don’t we?
If you are after this convenience, but you already have a ceiling fan that did not come equipped with a remote control, then you are in luck. Adding a remote control to a ceiling fan is actually a pretty simple process (if you have basic wiring skills or the ability to learn them).


It is possible to add a remote control to an existing ceiling fan. Brands may sell remote kits for certain fans. Otherwise, there are universal kits that work with a wide range of brands/models. The kits contain a remote and receiver. The receiver is connected to the circuit between the house and fan wires.
Ceiling Fans Can Be Converted to Remote Control
As long as it isn’t an archaic model, you should be able to add a remote control to your ceiling fan.
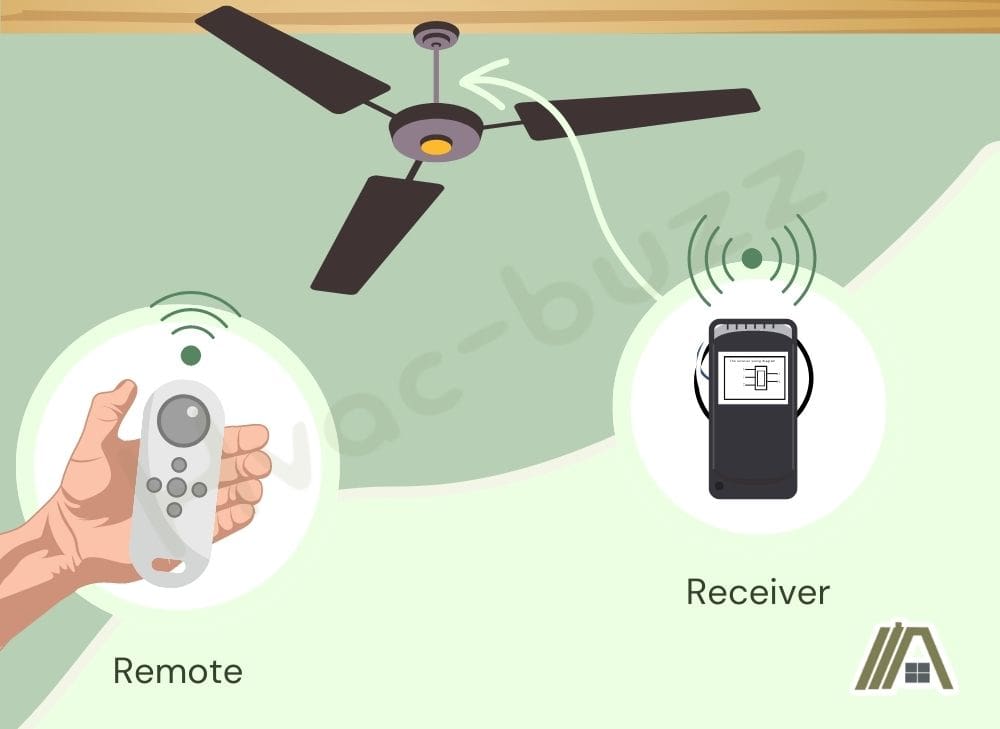
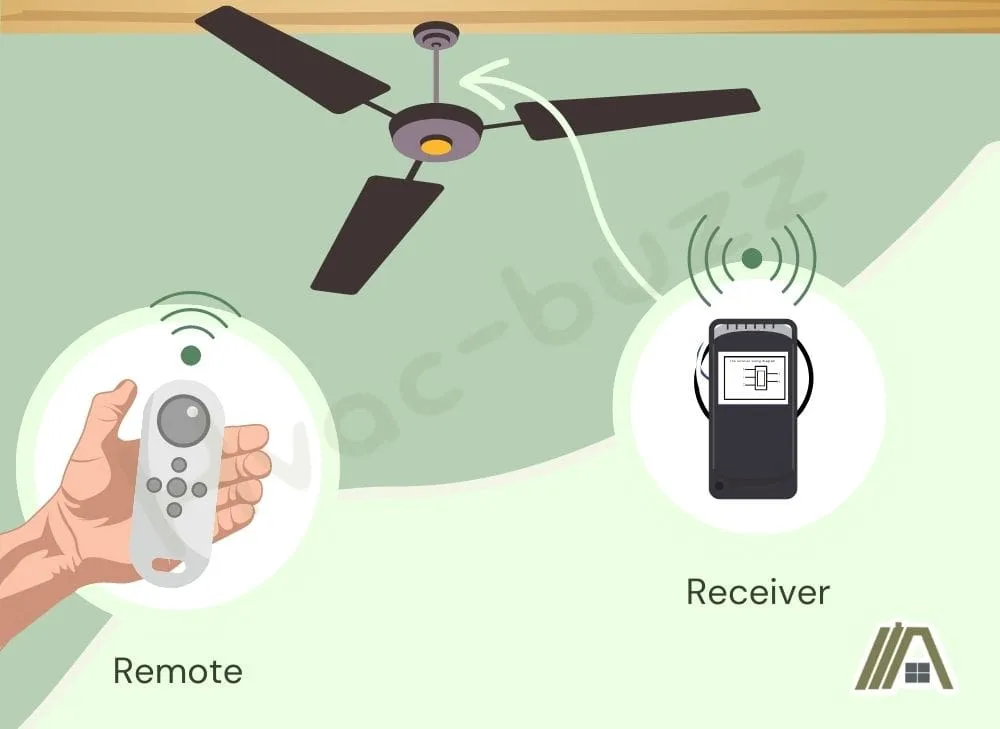
Now, as you have probably guessed, it’s not a matter of buying a remote and pointing it at the ceiling fan (unless your fan secretly already has a receiver!). Remotes do not function in isolation. They work with a receiver that is connected to the fan and house wiring.
The remote and receiver have a DIP (dual in-line package) switch frequency that’s set to match so that the remote (which functions as the transmitter) can send signals to the receiver.
Once the receiver’s wiring is properly connected, you should be able to control the fan with the remote.
May Have to Buy a New Canopy
The fan’s wiring is usually tucked between the junction box and the mounting bracket. A canopy is used to cover the mounting components and wiring connections to keep them contained and for improved aesthetics.
The receiver would have to be placed underneath the canopy since it’s also wired to the fan. If your current canopy is too small to house the receiver, you would have to get a bigger replacement that matches your fan’s design.
Most standard mounting brackets feature a compartment where the receiver can be placed. If yours doesn’t, you might have to purchase one that can hold your receiver in place.
Universal Ceiling Fan Remote Control Kits
It might be difficult to get a brand-specific remote control kit for your ceiling fan. Universal kits, on the other hand, are easily accessible. They work with most ceiling fan brands and are pretty inexpensive. Major brands like Hunter and Harbor Breeze even sell universal ceiling fan remote kits.
You can purchase them online or at home improvement stores like Home Depot. Big department stores like Walmart also sell them. They are typically priced between $13-$40.
Here are the contents of a universal ceiling fan remote kit.
- Remote
- Receiver
- Wall holder
- Some include wire nuts and screws
Most universal remotes have buttons for switching the fan on/off, controlling the fan’s speed, turning the light on/off, and timing the fan to run for x amount of time.
Best Ceiling Fan Remote Control Kit
There are various kinds of ceiling fan remote control kits on the market. Some are limited to certain ceiling fan brands, so before you purchase a kit, ensure that it is compatible with your fan.
I’ve researched several remote control kits and I’ve put together my top three picks.
They are all compatible with most ceiling fan brands and every kit on this list contains the following.
- User manual
- Remote/transmitter
- Receiver
- Wire connectors
- Wall holder
- Screws
1. YukiHalu 3-in-1 Small Size Universal Ceiling Fan Remote (amazon link)

Specs:
- Maximum range: 98 ft
- Maximum load power: fan – 100 W, light – 200 W (incandescent) or 100 W (LED)
- Light control: on/off
- Speed options: high, medium, low
- Timing control: 1 hr, 2 hr, 4 hr, 8 hr
Pros:
- The receiver is small, so it easily fits into the canopy of most ceiling fans.
- Soft switch and zero cross detection technology limits surge current.
- The remote has a wide range.
- Features four timing options.
Cons:
- Doesn’t have a dimmer function
- No reverse button
2. LPHUMEX Universal Ceiling Fan Remote Control Kit (amazon link)

Specs:
- Maximum range: 50 ft
- Maximum load power: fan – 120 W, light – 300 W
- Light control: on/off
- Speed options: high, medium, low
- Timing control: 1 hr, 2 hr, 4 hr, 8 hr
Pros:
- Strong signal.
- Comes with four timing options.
Cons:
- No reverse button.
- No dimmer option.
3. CENMING 53T Ceiling Fan Control Replacement (amazon link)

Specs:
- Maximum range: 60 ft
- Maximum load power: 240 W
- Light control: on/off and dimming
- Speed options: high, medium, low
- Timing control: Not available
Pros:
- Has a dimmer function.
Cons:
- Doesn’t have timing options.
- No reverse button.
Should I Add a Remote Control to My Ceiling Fan?
So, we have established that it is possible to add a remote control to your ceiling fan and that there are even kits that help you to do this. But should you?
In terms of cost, you are looking at between $100 and $200 for a new remote-controlled ceiling fan, whereas the remote kit only costs $13-40. The fans that come with a remote control system will not be designed differently because ceiling fans are actually really simple devices when it comes to how they work.
So, if you were to buy a new remote-controlled fan, you will likely have to install the receiver in the same way as you would when adapting an existing fan. The only difference is that you would not have to first disconnect the fan and house wiring.
This makes adapting your existing ceiling fan a comparable and budget-friendly option.
There are many benefits to remote-controlled ceiling fans:
- You can control it from your sofa, bed, or desk, making it very convenient.
- The added timer options that come with many fans. You can set your fan to run for two hours when you are going to sleep and you won’t have to worry about getting too cold in the night and waking up to pull up the blankets or manually turn off the fan.
- You won’t have to guess what speed setting your fan is on and spend ages tugging on the pull chain and waiting for the fan to respond.
- If you are shorter or you would like your children to be able to operate the ceiling fans, then you don’t have to keep a step-ladder nearby to reach the pull chains.
- Having more than one way to control your fan makes it so much easier when one of the other methods fail. Just imagine your pull chain breaking off while the fan is set at high speed. If you could just turn it off with the remote instead of at the breaker, it would be so much more convenient.
Ultimately, I would say that it is really worthwhile and easily-achievable to add a remote control to your ceiling fan.
Tip: Don’t Get Rid of Your Wall Switch
Ceiling fan remotes do not need to be connected to a wall switch in order to function perfectly.
However, there are certain situations where a wall switch could be beneficial or even mandatory.
The National Electric Code states that ceiling fan lights should be connected to a wall switch, so wall switches are only optional if your fan is only a fan.
That said, the electrical code in certain locations demands that ceiling fans be connected to a wall switch. So, this is something you should take into account before you proceed with the project.
In terms of benefits, having a wall switch is a great backup should your remote become defective, especially if the fan doesn’t have a pull chain. It also provides added safety against electrical accidents whenever you need to work on the fan.

Adding a Remote Control to the Ceiling Fan
Adding a remote control to an existing ceiling fan is an easy DIY job. The most complicated part of the process will be ensuring that the wires are matched correctly. Since the wires are color-coded and even labelled, in some cases, this doesn’t really complicate the process much at all.
What Do You Need?
| Item | Amazon link |
| Remote and receiver (remote kit) | View |
| Flathead screwdriver | View |
| Stepladder | View |
| Wire stripper | View |
| Wire connectors | View |
| Batteries (according to your remote’s battery requirement) | View |
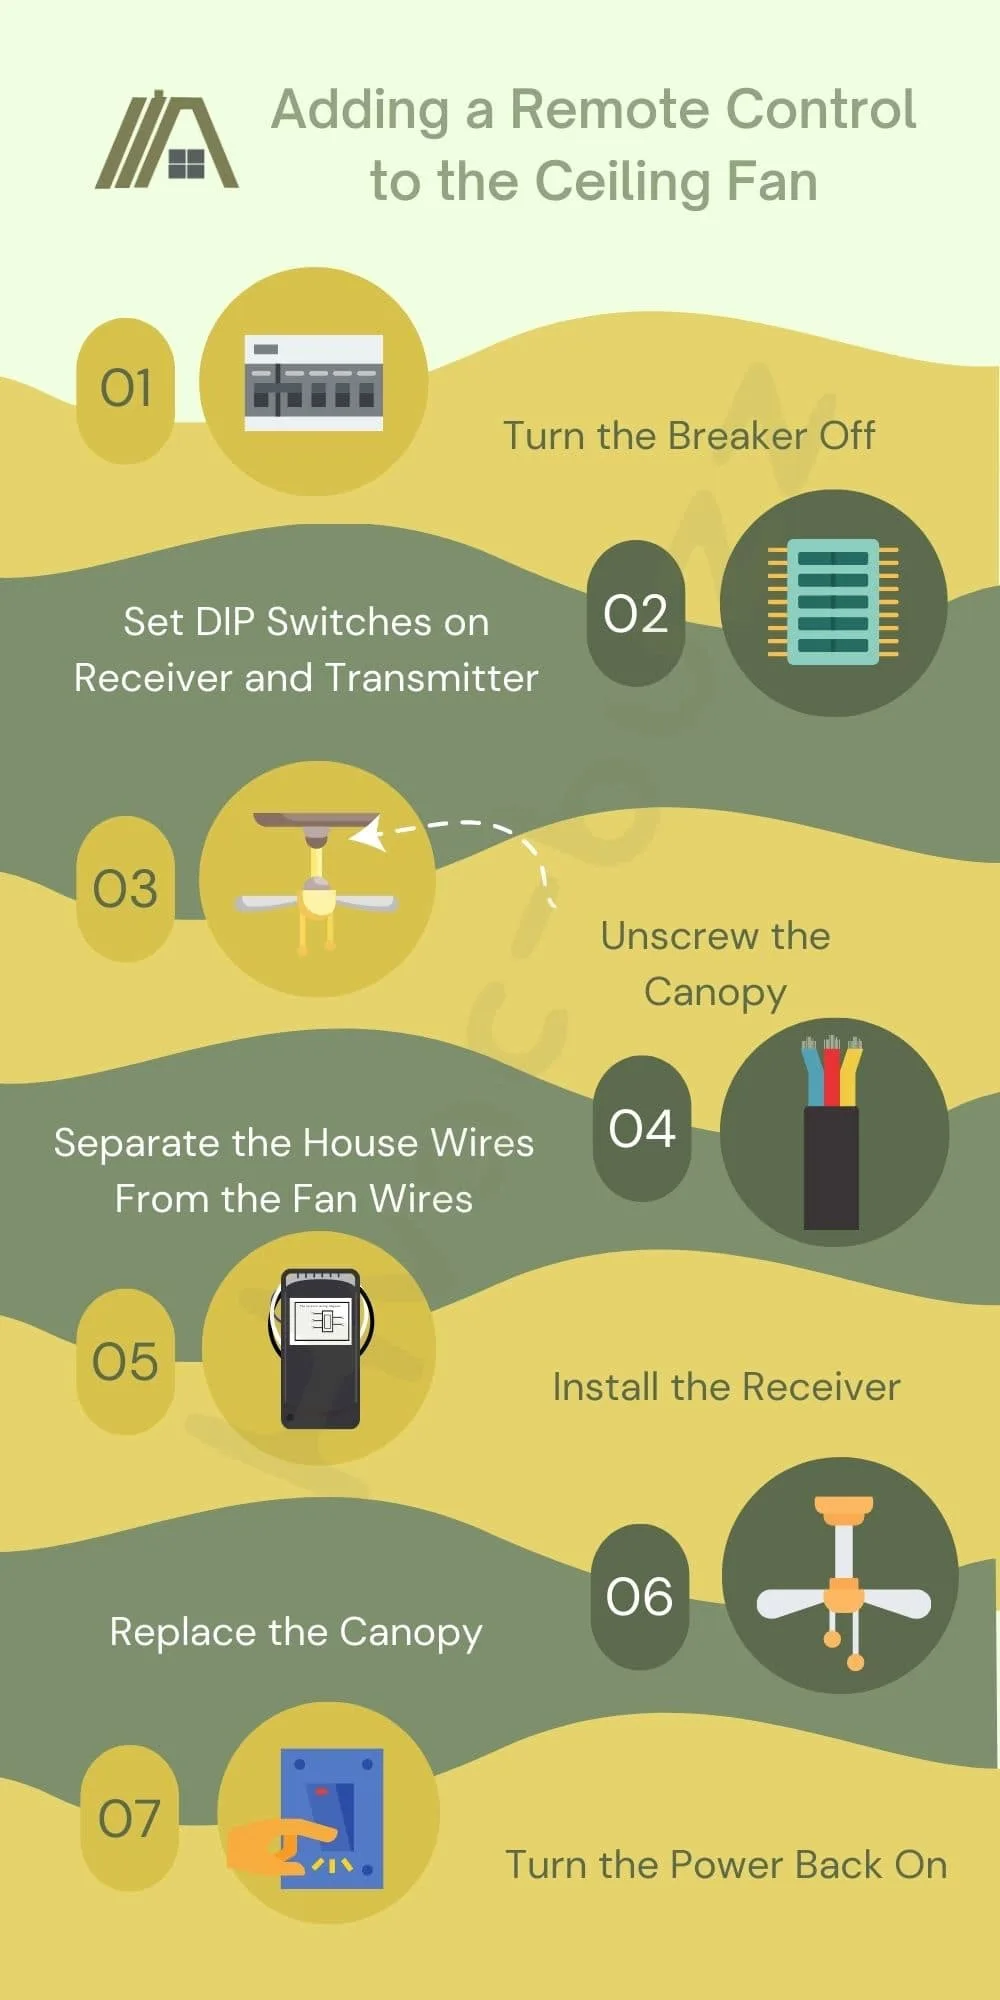
1. Turn the Breaker Off
The first step is to ensure your safety. You’ll be working with electrical wiring, so switching off the fan isn’t the only precaution you must take. You must switch off the fan from the circuit breaker. This way, the wires aren’t charged with electric current and you wouldn’t be at risk of electrical accidents.
To allow the remote and pull chain to function together, use the chain to set the fan speed to high and to switch on the light before turning the fan off at the wall switch and breaker box.
2. Set DIP Switches on Receiver and Transmitter
Ceiling fan remotes and receivers communicate through a set frequency. They both have a DIP switch that should be set to match.
Most remote kits are set with the factory’s default pin on delivery. But it’s always best to use a different pin in case you and your next-door neighbor have a similar kit from the same brand.
To set the pin, locate the DIP switch on the receiver and remote (usually located in the battery panel) and input a new pin. Ensure that you insert the same digits in both units.
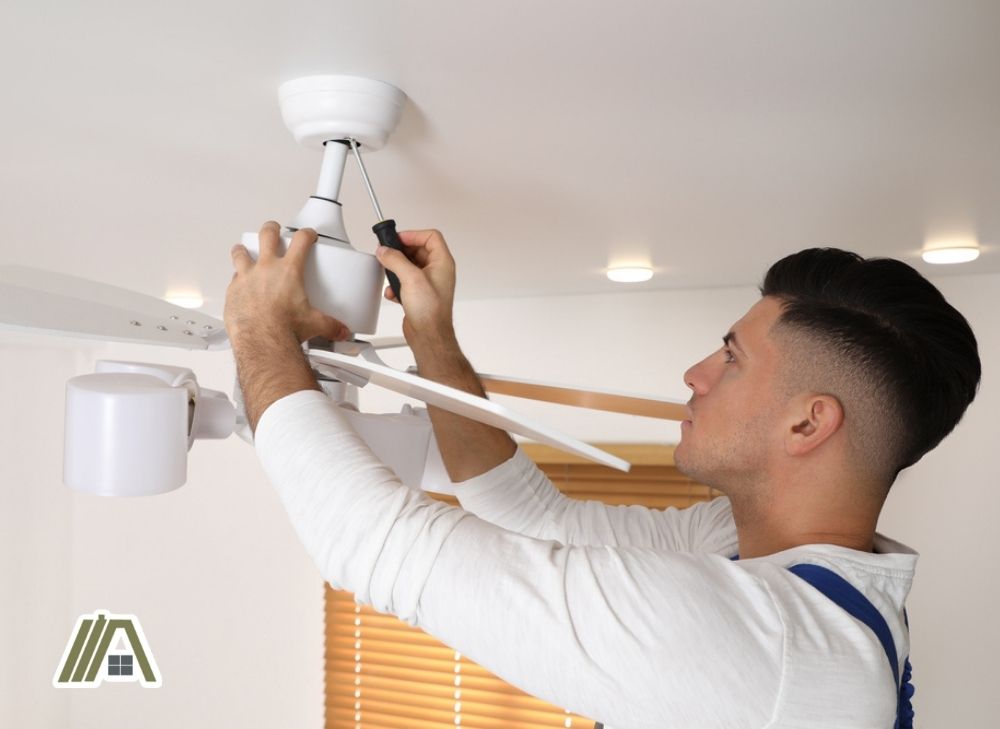
3. Unscrew the Canopy
To access the fan’s wiring, you need to detach the canopy. To do this, locate the screws that are used to secure the canopy in place and unfasten them. Then, pull the canopy down the length of the rod.
Depending on your fan’s design, you might have to detach some blades in order to access the wiring properly. You might also have to disassemble the fan more fully.
Before you proceed, check that the receiver can fit into the canopy. If the canopy is too small, you will need to purchase a bigger replacement.
4. Separate the House Wires From the Fan Wires
Installing the receiver involves rewiring the fan, so you would have to disconnect the fan wiring from the house wiring.
Once you’ve identified what category each wire belongs to, move the house wires to the top of the bracket and the fan wires should hang lower.
Doing this makes rewiring the fan easier, and it helps to prevent mix-ups that could occur if the wires are placed together.
5. Install the Receiver
To install the receiver, you would have to pair its wires with the corresponding fan and house wires (i.e., wires coming from the ceiling).
Remote kits come with user manuals, so before you proceed, consult the manual for installation instructions specific to your receiver.
Depending on how your fan is mounted, it might be best to dismount the fan for easier access to the house wires and then reattach the fan in order to connect the fan wires.
Wiring varies from one fan to the next. In some cases, you might simply be required to pair the wires based on colors.
Receivers typically have two wires on one side that connect to the house wires and three wires on the other side that connect to the wiring from the fan. Each wire on the receiver is labeled, so locate the corresponding wires, strip the insulation, twist the wires together, and secure them with a wire connector.
For improved support, use electrical tape to secure the wires to the connectors.
6. Replace the Canopy
Make sure the wires are properly connected. Once that is done, tuck the wires and receiver underneath the canopy. Ensure that wires or the receiver’s antenna aren’t poking out and then refasten the canopy screws.
7. Turn the Power Back On
Now that you’ve installed the receiver, turn on the power at the breaker box and insert batteries into the remote. Next, test the remote to see if the fan responds to it.
Here are two videos you might find helpful if you are more of a visual learner.
Sources
https://www.familyhandyman.com/project/how-to-install-a-ceiling-fan-remote/
https://support.hunterfan.com/hc/en-us/articles/360041896534-How-to-Install-a-Ceiling-Fan-Remote-
https://www.homedepot.com/c/ah/how-to-install-a-ceiling-fan-remote/9ba683603be9fa5395fab901469c9e56