The way that you ventilate a bathroom is vital to making it worth while installing (note: not installing it is not a solution). Properly executed ventilation is a vital component of keeping your house free of mold and moisture damage (superficial and/or structural).
Since it is so important, I’m going to provide you with the options and the details for each option.


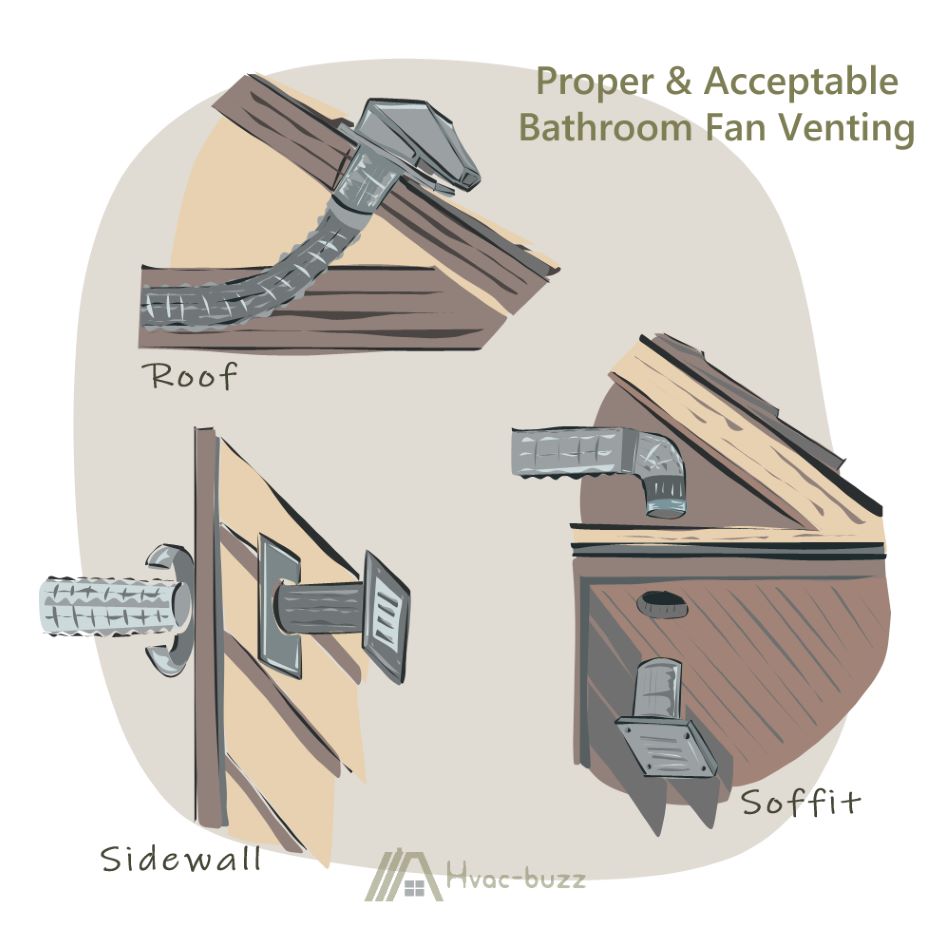
Bathroom fans must be vented and vented to the outside. The most effective options are through the roof, an exterior wall, or the soffit. Choosing between these depends on many factors, including the length and complexity of the duct run, the weather, and the location of openings into the house.
Venting Is Required and Regulated by Code
You should double check with your local codes, but according to the International Residential Code (IRC) you need sufficient natural ventilation in bathrooms or, in the absence of such, you need adequate mechanical ventilation (Section R303.1).
The code also details the rate, ducting, and termination of these systems in Chapter 15 and Chapter 16.
Bathroom Fans Have to Vent Outside
Section M1501.1 of the IRC specifies that the bathroom fan has to vent outdoors. It cannot be vented into any indoor room or space, including attics, crawl spaces, and soffits.
The logic behind this is simple. Think of all the damage that you are trying to prevent in the bathroom. Why would you just funnel the moisture to another room, where it can cause this damage?
To achieve outdoor venting, you can go through the roof, the wall, the soffit, or the gable vent.

Is There a Bathroom Fan That Doesn’t Vent Outside
For a bathroom fan to provide ventilation in accordance with prevailing building codes, it has to be vented outside. You cannot vent into another room or space in the house. There are ductless bathroom fans, but these can only be used for odor control, not ventilation.
Building Codes Forbid Internal Venting
Technically, any bathroom fan on the market can be vented internally, but to do so would contravene the International Residential Code (IRC) Section M1502.1, which states the following:
“The air removed by every mechanical exhaust system shall be discharged to the outdoors in accordance with Section M1504.3. Air shall not be exhausted into an attic, soffit, ridge vent or crawl space.”

Internal venting of bathroom fans is not just a building code violation; it is potentially damaging to the structural integrity and finishes of your home and your health as a result of the moisture carried in the exhausted air.
- Reasons Why A Bathroom Fan Should Not Be Vented Into The Attic
- Reasons Why a Bathroom Fan Should Not Be Vented Into a Crawl Space
- Types of mold and their adverse health effects
What About Ductless Bathroom Fans?
Ductless bathroom fans are not vented outside; however, they cannot be classified as ventilation systems (i.e., systems that remove moist, contaminated, or hot air from a room and provide a means by which fresh air can be supplied to replace the exhausted air).

Ductless bathroom fans run bathroom air through charcoal filters and are able to remove dust and odors from the air in the bathroom. The bathroom air is circulated, but not changed.
So, if you have another source of ventilation, such as an operable window, then you do not need a bathroom fan that provides ventilation, and you can use the ductless bathroom fan to control odors.
Often, in bathrooms that contain only a toilet and basin (no shower or bathtub), ductless bathroom fans can be used instead of vented bathroom fans because moisture is not an issue in these rooms.
However, you would still have to ensure a level of ventilation in the room. An operable window, or even just leaving the door open when the toilet room is not in use should be sufficient.
If you would like to learn more about ductless bathroom fans, you can check out my article on Are Ductless Bathroom
Rules for the Duct Run
The duct run must be as short as possible. The longer it is, the more velocity the air loses along the journey, and the more likely it is that the steamy air won’t quite make it out of the ducts.
Gathering moisture and dirt in the ducts causes blockages, rusting, and dripping, all of which hinder proper ventilation and/or exacerbate the negative effects associated with excessive moisture indoors.
In addition to being as short as possible, the run must be as straight as possible. Bends and corners rob the air of momentum, causing the same problems as long ducts. You should avoid 90-degree angles as much as possible. If you can, combine two 45-degree angles instead.
The IRC has rules about the maximum length of the runs, depending on the size of the fan, the number of elbows, and the size of the ducts.
You will find a detailed table and more information in my article on Bathroom Fan Duct Length and Dimension Guide. For now, we have enough information to look through our venting options.
If you’d like to find out what duct to use, check my article on What Kind of Duct to Use for Bathroom Fan
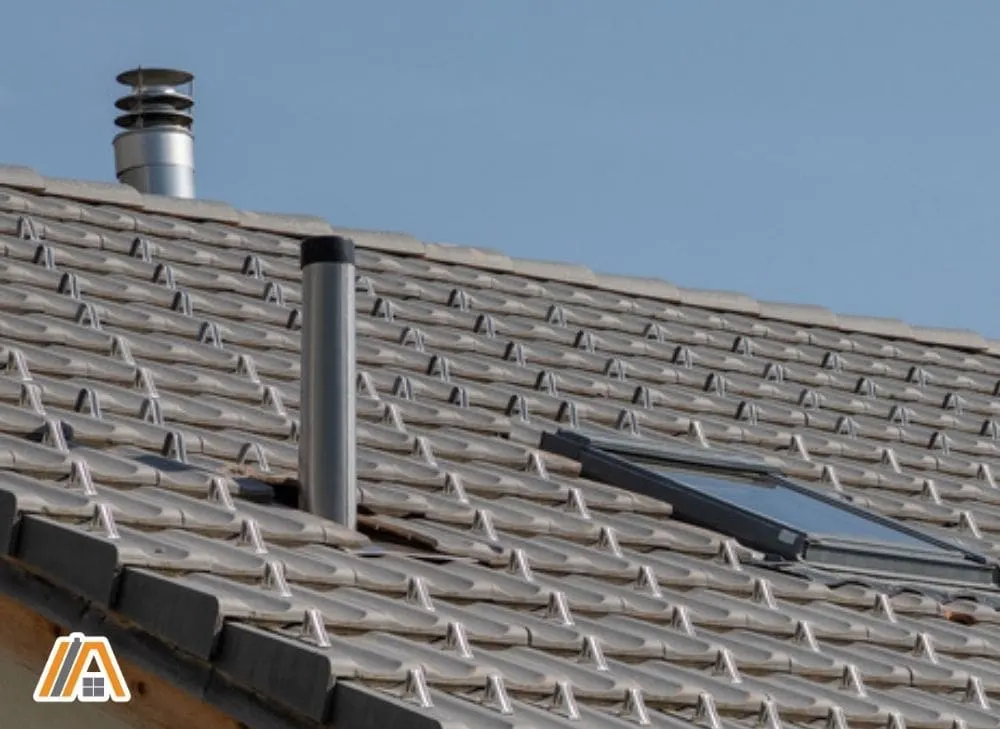
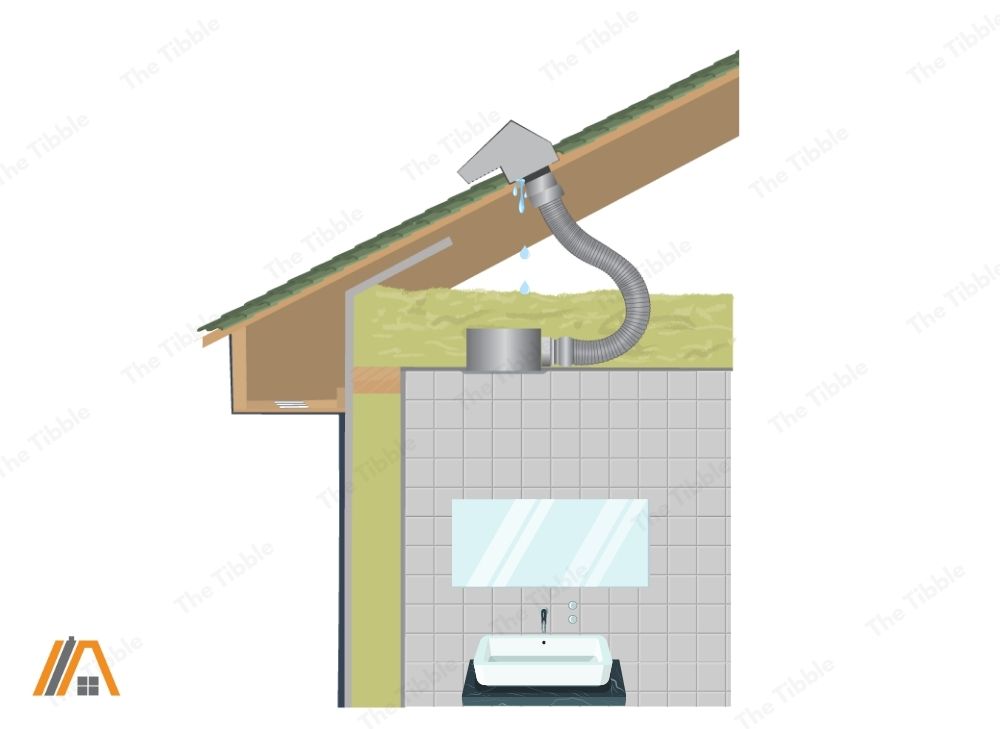
Venting Through the Roof
Venting the bathroom fan through the roof is the most common option, and for good reason. Most bathrooms are situated near the bedrooms, which means that regardless of whether you have a single or double story house, the bathrooms will be directly below the attic.
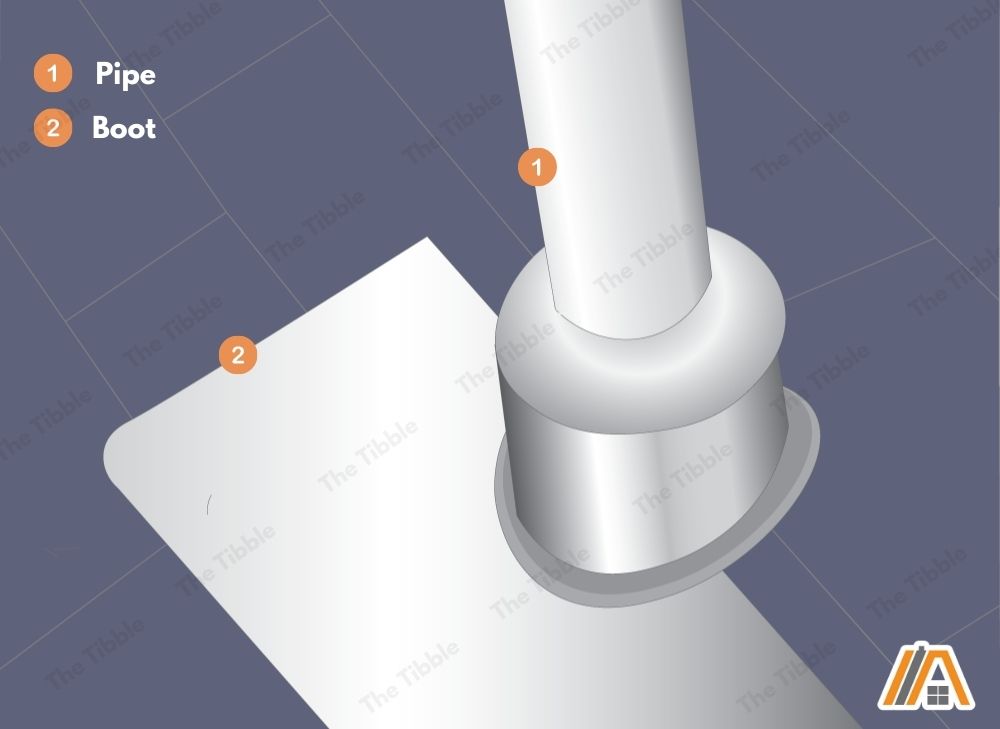
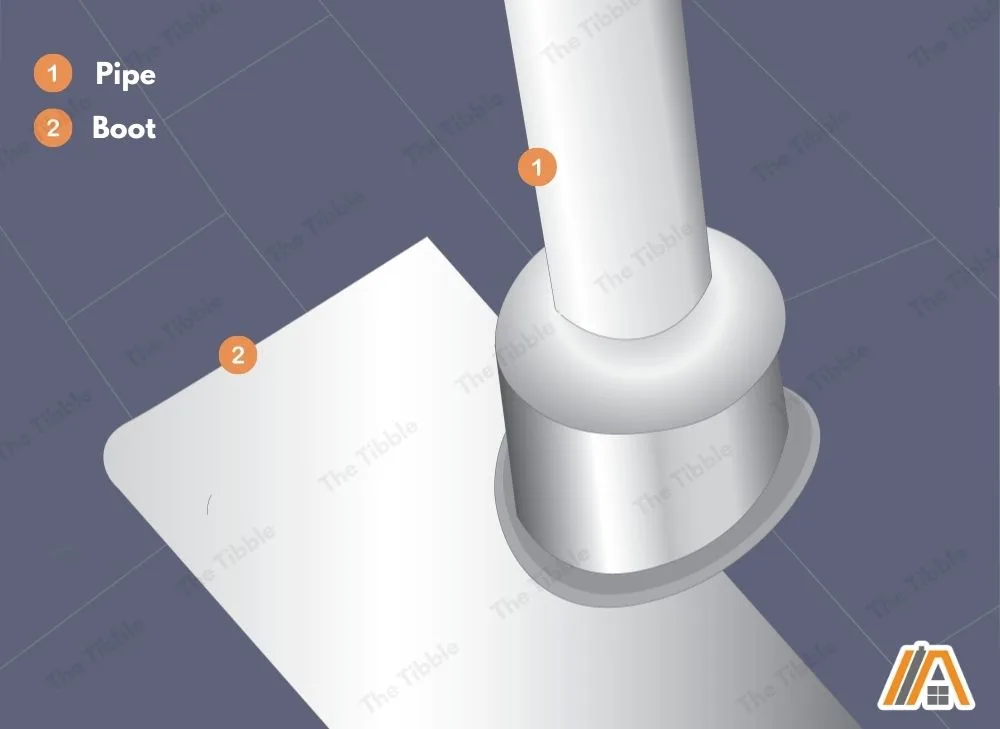
Vents through the roof require flashing or roof boots, which have flanges that extend underneath the roof shingles to prevent water from seeping in from above but you also have to ensure that they are properly caulked and sealed for the best effects.
Roof hoods or caps add extra protection but they also specifically prevent rain, debris, etc., to from falling into the duct through the vent.


Lightweight gravity-operated doors on hoods or caps allow air to escape from the ducts but prevent drafts from outside from blowing under the cap or hood and through the ducts.
How to Vent Through a Roof
Shingled Roofs
- Decide where the vent needs to go through the roof and mark this spot from the inside by driving a nail between the rafters. You should be able to see this nail from on top of the roof.
- To install your duct and vent hood or flashing, you’ll need to cut out a shingle. Measure your vent hood or flashing so that it is centered on the nail, and cut the shingle so that you can slide the hood in place.
- You’ll also need to loosen adjacent shingles and break the seal so that you can fit the flange underneath them.
- Once your fitting is correct, you’re ready to cut your hole for the ductwork. It’s best to use a hole saw of the proper diameter, but you can also use a reciprocating saw.
- With the hole cut, have someone pass one end of the duct up to you from inside through the roof.
- If installing metal ducts, cut two tabs on each side of the end going through the roof, and then bend these over so that you can drive a roofing nail through each.
- With the duct in place, you need to install the hood/flashing with a bead of tripolymeric locking seal along the top, left, and right sides of the outer edge underneath the hood flange. The hood/flange goes under the top shingle layer, while the sealant sticks to the roof and bottom shingle layer.
- Make sure you press it down into place and then lift the top layers of shingles to nail the flange to the roof on the same three sides.
- Reseal all of your shingles.
Metal Roofs
There are many steps to venting a metal roof that follow the previous example, but there are some key differences.
- The roof boot for a metal roof is different. You will use a flexible rubber roof boot that can form fit to the sheet metal ribs. It will have guide rings for you to cut to fit the duct diameter. Cut it to create a tight seal. If you happen to cut it too loose, you can go around it with sealant afterward.
- Before using a hole saw or reciprocating saw to cut a hole in the roof, you might use a hammer and chisel with metal sheers to cut a hole for the duct through the metal.
- When attaching the boot to the roof, you will need to apply a bead of sealant all along the bottom of the roof boot before applying it to the metal. Press the boot firmly so that it fits properly around the metal rib.
- Use screws all along the outside edge of the roof boot to fasten it to the roof and make sure you have a proper seal.
- Once you have fastened the boot to the roof, apply another bead of sealant to the outer edge of the roof boot.
Pros of Venting Through the Roof
Bathrooms often have a clear path through the attic or rafter space to the roof.
The actual process of venting through the roof is comparatively easy, which has the upside of making this installation the one that contractors are the most familiar with and, therefore, skilled at doing.
Hot air carried by the ducts naturally rises, so this helps to get the exhausted air to the roof and encourages it to move away from the house once it is released.
The terminal vents are out of sight for the most part. Even when you look at them, having a roof vent is so common that it does not mar the look of the house from the outside.
Cons of Venting Through the Roof
The most obvious disadvantage of venting through a roof would be the risk of leaks if you didn’t install it right. A hole in your roof will always present this potential problem.

Some DIYers may shy away from this option since there is a lot that can go wrong while cutting the hole.
Because there is an increased risk of leakage, standard roof vents are more likely to require frequent maintenance, which will involved climbing a ladder and balancing on your sloped roof, which is not something that everyone can do or do comfortably.
These vents are the ones most affected by rain, snow, and debris.
Because it is such a common venting spot, you may already have a couple of holes in the roof for other exhaust systems and plumbing. Adding another can compromise the roof’s structure too much or just make it look like the roof of a factory.
When the bathrooms are not located on the top floor of a multi-story home, then this is not likely to the shortest and straightest duct run available to you.
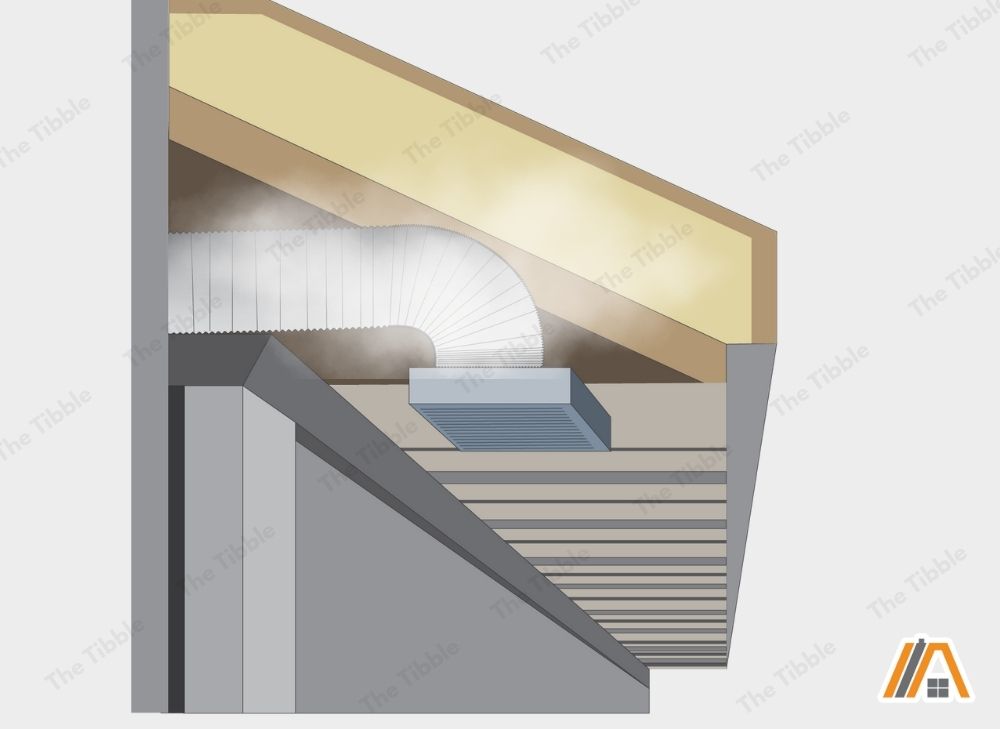
Venting Through a Soffit
Venting into a soffit violates the building code. Venting through a soffit is a viable option for you.
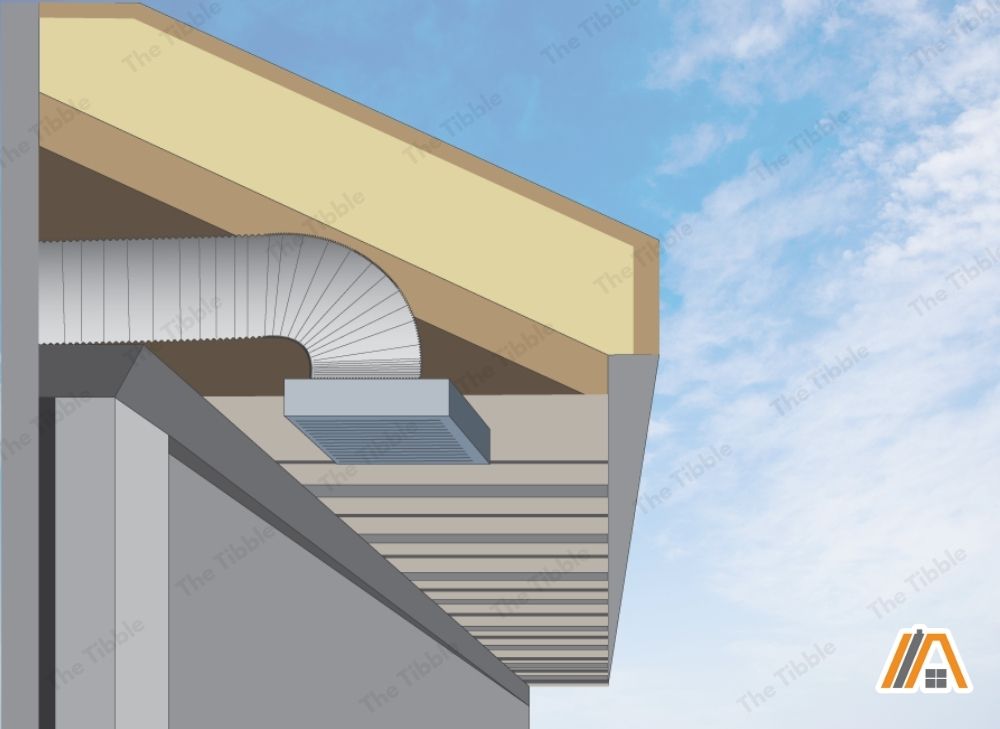

Venting through soffits is tricky because soffits are often vented themselves as part of attic ventilation, and there are rules about how close exhaust vents can be to intake vents.
When every soffit panel is vented or when every second or even third panel is vented, this eliminates the soffit as an exit point for the bathroom exhaust. Sometimes, you cannot install the exhaust vent far enough from any of the soffit vents.
Pros of Venting Through the Soffit
It’s quite easy to vent through a soffit. Once you are past the ceiling/wall materials and insulation (which you have to go through regardless of where your external vent will be), you only have to cut a hole into the soffit board. This is very simple and low-effort because of the nature of soffit board materials.
External bathroom fan vents installed in soffits are the most protected from the weather. Rain would have to be driving up at a certain angle to even reach the vent let alone enter the ducts, and any other kind of leaking is a non-issue, too. The vent is also sheltered from the wind.
Because they are tucked away, they are often the least visible option, which has aesthetic appeal.
If you don’t have an attic, then it’s often better to vent out the side as opposed to wiggling your way around the rooms below the roof so that you can install the vent through the roof.
Cons of Venting Through the Soffit
As mentioned, it’s often difficult to use this location because of the presence of soffit vents.
Another issue is that the hot air you are expelling will naturally rise right back against the vent in the soffit. Without a proper backdraft damper, this would make the whole system very ineffective.

This set up can also result in hot, moist air being trapped under the eaves and causing problems with the walls and eaves (long term moisture exposure is capable of overcoming even external weatherproofing).
While the soffit vent is sheltered from the elements, the soffits themselves are vulnerable to strong winds, which can break the soffits and, therefore, damage the vent. Insurance companies will often advise homeowners against the use of these locations in areas frequently hit by hurricanes.
Venting Through a Wall
The third option you have is venting through a wall.
This can either take the form of venting directly out through the wall in which the bathroom fan is installed, or it can involve wall- or ceiling-insert fans with traditional ducting that leads to a terminal vent in the wall or gable.
Some people believe that it’s a poor option for bathrooms with four interior walls, and that roof venting is the better choice. I don’t agree with that.
Think about it. If you have a bathroom in the middle of your house, you will have to take the ducting up into the ceiling and then along to the nearest wall, go up through that wall, and then out through the roof. Or you could just carry on along the ceiling and vent it out the nearest external wall.
Wall venting is pretty much your only option for basement bathrooms because taking the duct to the soffit or roof is definitely not the shortest route.
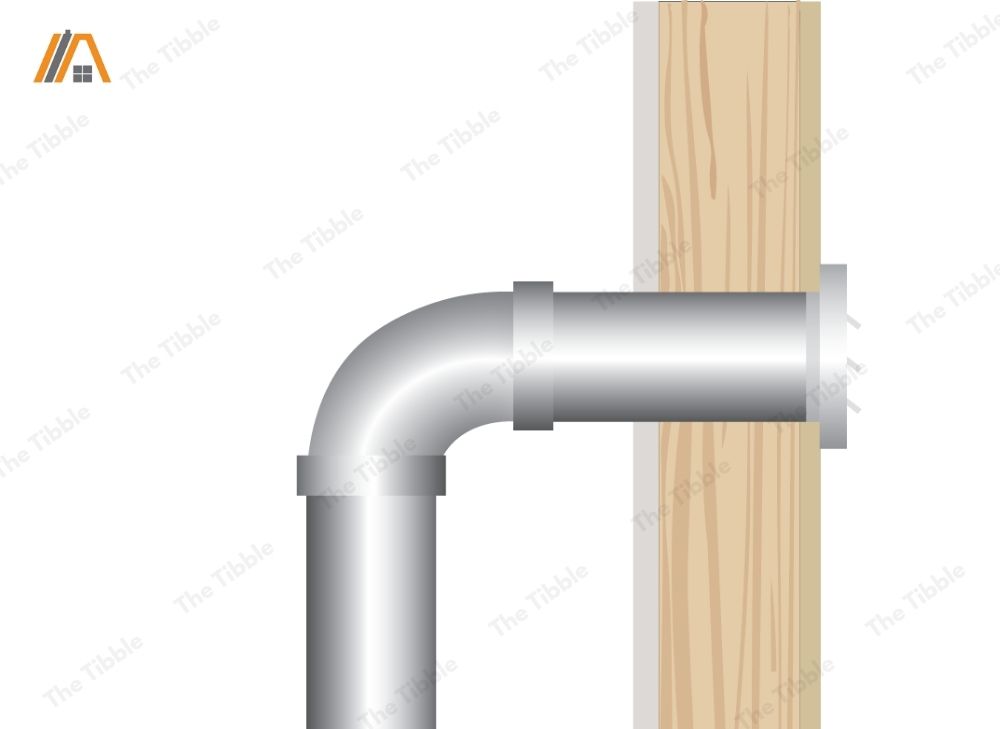
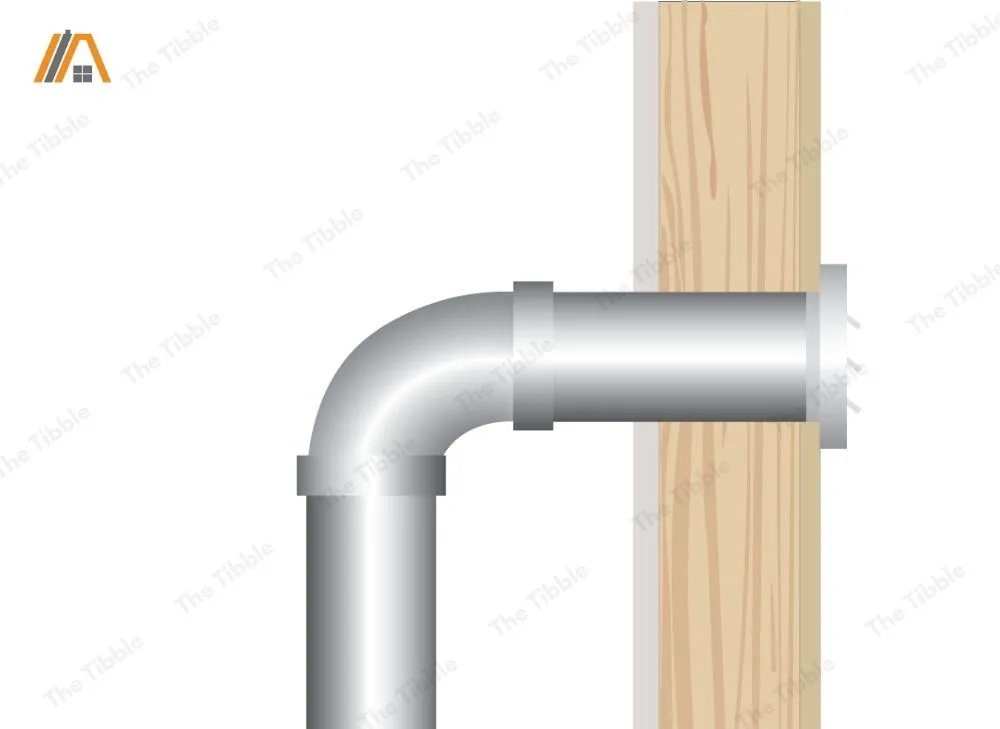
Another factor to consider here is what your walls are made of. Many North American homes are made from wood, which would not cause a problem. However, if you have a stone or brick house, making a hole in the wall is much more difficult.
How to Vent Through a Wall
Direct-Discharge Exhaust Fans
When you purchase one of these units, it normally comes with templates that you can use to mark your outlines on the inside and outside walls.
These units usually consist of a small, paintable grill for the inside wall, the fan and motor that go inside the wall, and a much larger vent that goes on the outside wall.
- Identify where your studs, wiring, and plumbing lines are located. You may need to consult an electrician or plumber for this.
- Decide where you want to place your fan and mark the outline of the duct hole with a pencil on the inside wall.
- Cut through the inner facing of the wall.
- Move any insulation from the area through which the duct will be running (but don’t forget to replace the insulation around the ductwork).
- Knock a nail through the external wall from the inside as a marker (make it in line with the center of the hole in the inner wall) or drill locator holes. If your exterior wall is composed of masonry, make sure you use a masonry bit to drill the locator holes.

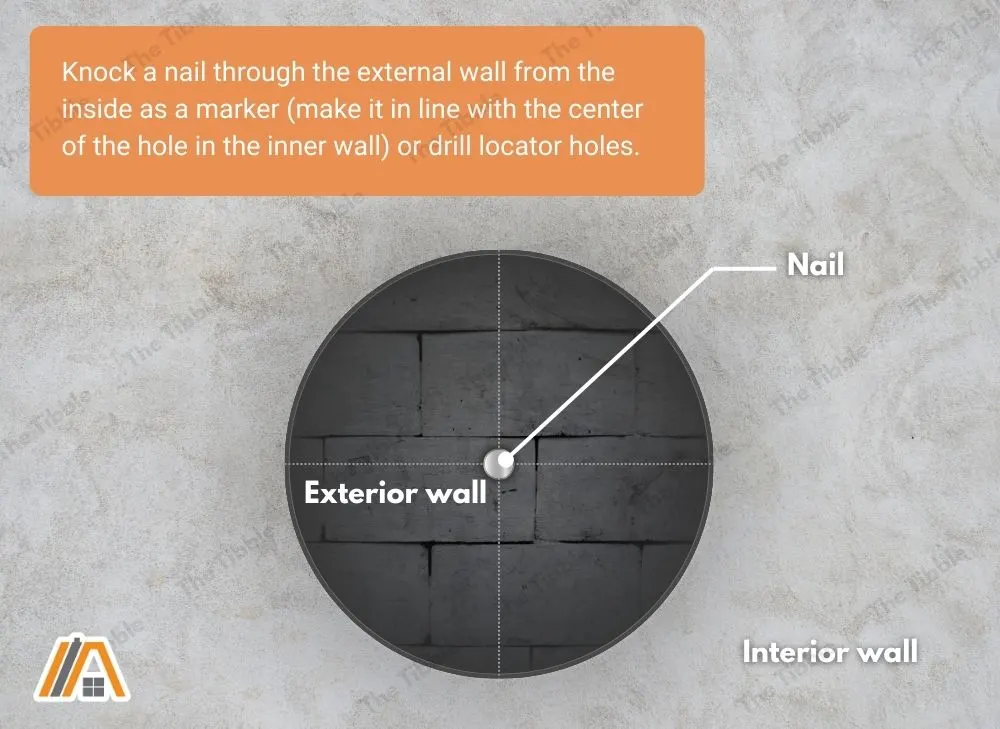
- Using the nail or locator holes as a guide for the center point and the template that came with the fan, outline the hole for external vent opening and cut it out. If cutting through masonry, it’s best to use a hammer and cold chisel.
- Install your outside wall vent or cap using screws. Be careful since some vents can direct moisture to your siding and cause water stains or mold, especially with wood siding or stucco.
- Seal around the vents to prevent air or water leaking through or around the internal and external vents.
Wall-Insert Fans
Installing wall-insert fans that require ducting to reach an external wall to vent through follows much the same process as above.
You still need to mark where the vent will go and cut a hole through the interior side of the wall. You also still cut a hole in the exterior side of the wall. The difference is that these two points will not be opposite each other.
You will also have to rearrange more insulation within the walls or in the ceiling to accommodate the ductwork.
For this venting option, you should gently slope the duct down towards the terminal point. The slope is not required by building codes, but it is a common practice.
The point of the slope is to ensure that any condensation formed at the end of the duct (the point at which it is most likely to form) runs out of the house as opposed to back towards the fan. The system is supposed to be moving the air out of the house, so a slope supports this function.
Pros of Venting Through a Wall
With the exception of wind blowing against the side of the house with the bathroom vent, wall vents are quite protected against backdrafting.
Leaks are also not a big issue. With proper flashing and sealing, even a driving rain should not make it around the external vent either. If water gets into the duct, the fact that the duct comes out horizontally means that the water is less likely to reach the bathroom.
Roof vents often get blocked by debris. This is not a problem with wall vents.
If you have an exterior bathroom wall and you choose a direct-discharge exhaust fan, you will have the shortest and most efficient bathroom ventilation.
Cons of Venting Through a Wall
When the wind does blow directly against the wall in which the vent is installed, the backdrafting can get quite bad, even with a backdraft damper.
The winds can also keep the exhausted air against the side of the house. Over time, the moisture and heat can cause damage and make your house look old and worn.
Venting through the exterior wall can also be particularly challenging if you have to cut through brick to install your vent.
Wall-mounted exhaust fans can often require additional wiring, and you may have to install a new electrical line. This may discourage some do-it-yourselfers who are not comfortable with electrical work.
Behind a Gable Vent
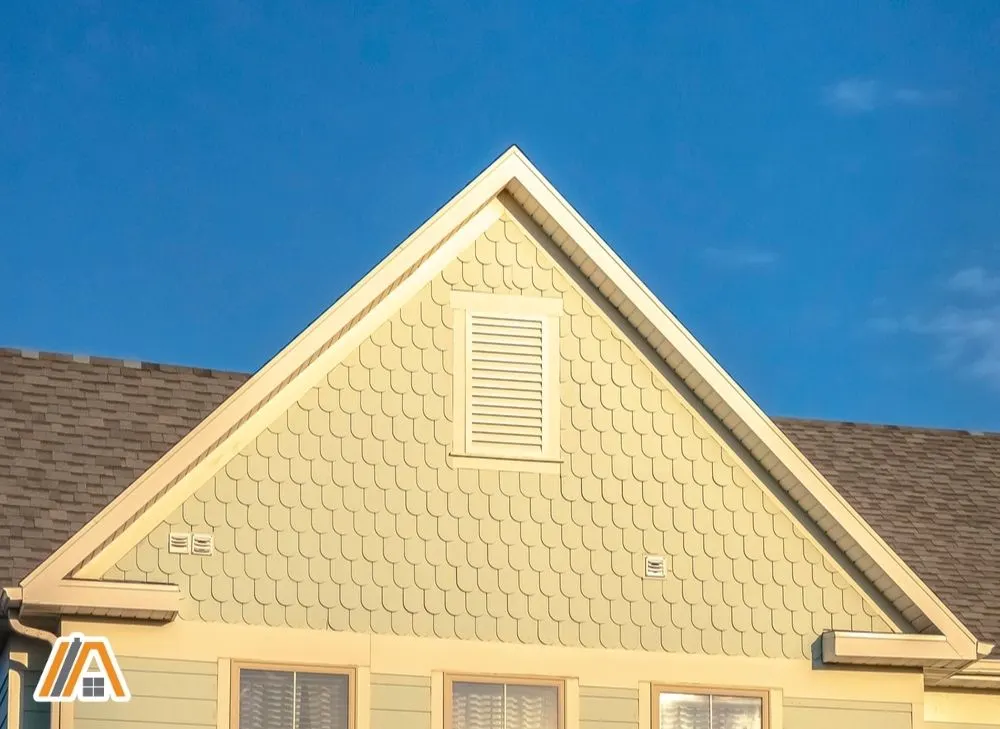
Another option, although not one that I recommend is to terminate your bathroom fan ductwork through an existing gable vent in your attic if you have one and assuming that your bathroom is toward one of the gable ends of the house.

With this approach, you have the benefits of not having to cut any holes in the external walls of your house and the external vent typically looks more pleasing.
However, there are significant drawbacks to this approach, which, in my opinion, far outweigh the benefits. In addition to all the cons that exist for wall vents, you have the following:
- Gable vents are not just decorative. They provide passive ventilation to the attic, so if you use it for the bathroom duct, you have to provide an alternative solution for your attic.
- The gable vent will determine the size of the duct that you use and it is possible that this may be the wrong size needed for your fan. For example, the gable vent pictured above would be too large.
Venting Under the Floor
Venting under the floor is not a commonly utilized option for bathroom fans, but it is a choice if your bathroom is far from an exterior wall.
In this case, you would have a wall-insert fan but instead of the ductwork running upwards, it will run down through the floor. From there, it would travel through the floor joists out to the exterior wall.
Personally, I do not see any benefits to this choice unless it allows you to ventilate the bathroom where all other options, including running the ducts up and out the external wall, are not possible.
In addition to the cons listed for venting through a wall, you have to add the fact that forcing hot air to travel downwards goes against its natural tendencies. This can make the ventilation less effective.
Choosing Where to Vent To
When it comes to deciding which of the terminal points discussed above to use depends on a number of factors.
- Which allows the shortest and straightest duct run? Whatever option this is pulls ahead of the pack when you move to consider the other factors.
- Do you live in an area that experiences heavy rain or snowfall? In such cases, venting though the roof is not ideal. Going through the wall or soffit would be better.
- What is the direction of prevailing winds in your area? If the wall that takes the brunt of it the one you would have vented through, then a roof vent is a better choice. The wind still blows over the roof in that direction, but it pushes the exhausted air away from as opposed to back into the duct.
- How many vents are already in the roof and how big is the roof? You don’t want too many holes in the roof. The number that becomes excessive depends on how large the area is.The more holes you have, the more chances there are of leaks and the more the structure is compromised.
- Are there soffit vents that would prevent you from venting through the soffit? Then opt for a roof or wall vent. But, you have to consider the distance between the soffit vents and the proposed venting spot on the wall. It cannot be too close to the air will be pulled into the attic.
- Where are the homes air intakes? You cannot vent the bathroom fan near a passive or mechanical intake opening. This is one of the reasons why roofs are so popular. They are furthest from windows and doors.