There’s a mystery thumping noise coming from your laundry room, and you are not sure what it could be. More than likely, it’s going to be an issue with air getting into the vent and causing the damper to flap or the ducts to rattle.
The solution to your windy day woes is not complicated, so don’t worry! There are a number of inexpensive and quick solutions you can use to stop the noise.


Dryer vents that are noisy when the weather is windy most likely have flapping dampers. Dampers flap if they are low-quality, old, broken, or installed wrong. To prevent dryer dampers from flapping, install a vent hood, apply stoppers, adjust the spring load, add weights to the flaps, or replace the damper.
Likely Source: Flapping Damper
The likeliest source of noise from your dryer vent is a flapping damper.
The damper is a small piece of rigid plastic or metal that allows air to be vented from the dryer but prevents air, debris, and animals from coming into the vent from outside.

When it’s windy outside, a poorly designed or old damper can get picked up and opened and closed again by the wind, which creates a tapping noise. While the damper needs to be able to open from the inside when air comes through, it shouldn’t be able to be forced open by the wind like this.
Aside from the damper flapping noise, wind can also cause the ducts to shake and rattle as if the dryer is on. If the damper problem is solved, this should go away as well because the damper should keep the wind out of the ducts.
Find out how this problem also occurs with bathroom vent flaps and what to do about it.
Solutions to Noisy Dryer Vent
Install a Vent Hood
One option for keeping the wind out of your dryer vent and thereby keeping the damper from flapping noisily is to install a vent hood on your dryer’s external vent if you don’t have one already. The vent hood will cover the front of the opening and prevent the wind from gaining access to the damper flaps.
There are a variety of styles of hoods that you can attach to the end of your vent pipe by snapping the round part of the hood into the end of the duct, applying a bead of caulk around the edges to seal it to the side of the house, and finally screwing the edges in place.
Some of the styles include those with a damper included (amazon link), those without (amazon link), and those with a bird guard included (amazon link). They are also available in stainless steel (amazon link) rather than plastic if you prefer the look and extra durability.
Many dryer vents come with vent hoods already attached. It is not too expensive an option to purchase one of these, so you can replace your existing vent with one that has a hood (amazon link) if you so choose.
The process of installing this dryer vent involves removing your existing vent, applying caulk to the edges of the vent hood, and pressing the edges firmly against the wall until it sets. The video below shows this process in more detail.
Felt, Foam, or Silicon “Stoppers”
An inexpensive solution to an external flapping damper is to apply stoppers. These act to prevent the plastic/metal flap from banging against the plastic/metal housing, much like a doorstop. They can be made from different materials, and they can be either bought or homemade.
The video below suggests a few solutions, including applying foam weatherstripping (amazon link), which is usually used to make windows and doors airtight. All you need to do is apply a few pieces of weather stripping where the damper would hit the opening of the duct.
Thin weatherstripping, like the product linked above, that is only ¼” thick is ideal since this will allow the least amount of backdraft into the vent, which would otherwise cause a cold draft.
You can also use furniture pads for this project. These are highly affordable, come with built-in adhesive, and can be cut down to any size needed. Apply a few of these around the edges of the duct opening, and it should stop the flapping noise.
Furniture pads come in a variety of materials including felt (amazon link), rubber (amazon link), and silicone (amazon link). If you want the most weather-resistant option, go with rubber or silicone, and consider using a more durable adhesive, such as Henkel Stik n’ Seal Extreme Conditions Adhesive (amazon link).
Adjust Spring Load on Damper
If you’ve got a spring-loaded damper, you would think the noise would be fixed, since this type of damper uses spring tension to resist opening and flapping in the wind.
But if a spring-loaded damper is too weak to stay closed due to poor construction or wearing out over time, you can still have a noise issue whenever the weather gets a bit blowy.
If you’re hearing flapping with a spring-loaded damper, the problem may be that the spring load is not resistant enough and needs adjustment. If you can, make the spring tighter so that it doesn’t open as easily.
Increasing the spring tension can involve adding springs if applicable or removing the springs, rewrapping them around something that’s a smaller diameter than they already were (a thin nail may work for this process) and putting the springs back in the hinge of the damper.
You must be careful not to make it so resistant that it cannot open when it needs to (i.e., when the dryer is on)!
If your damper seems worn out, it may be time to buy a new one, which will likely be stronger and more wind resistant.
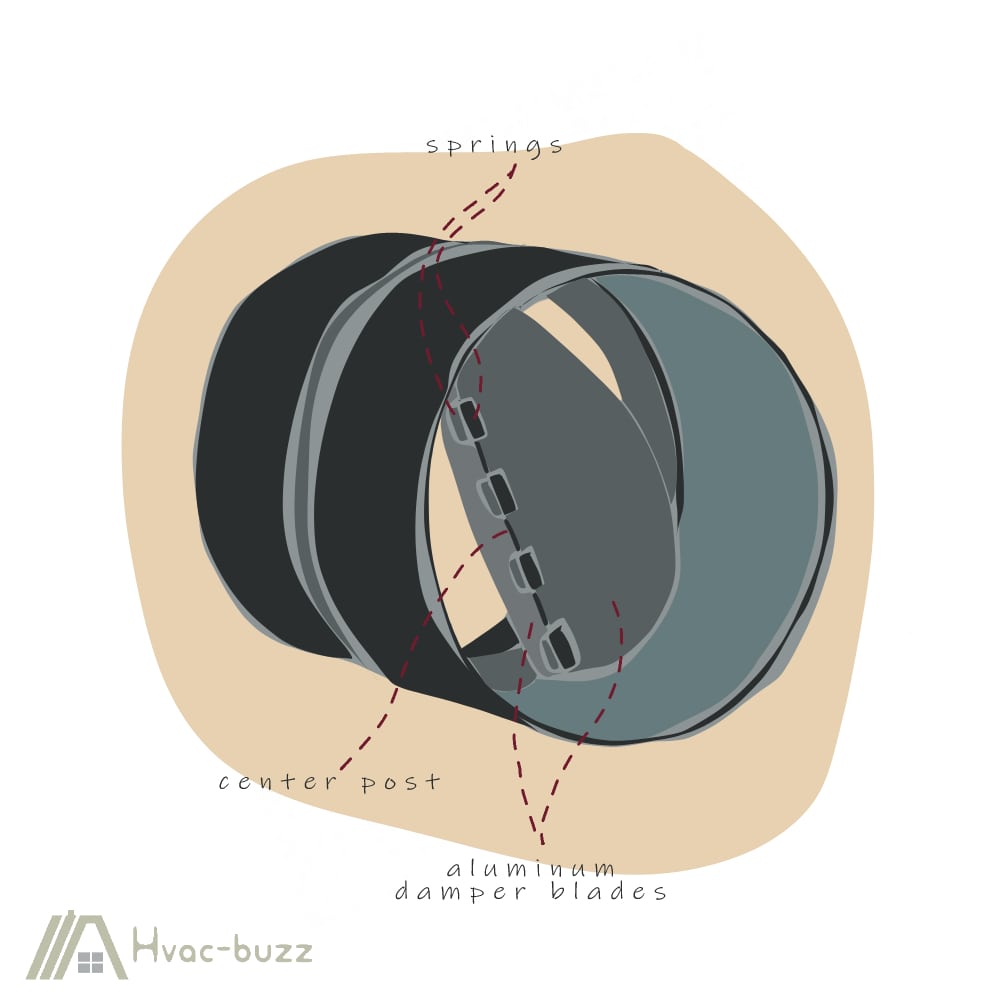
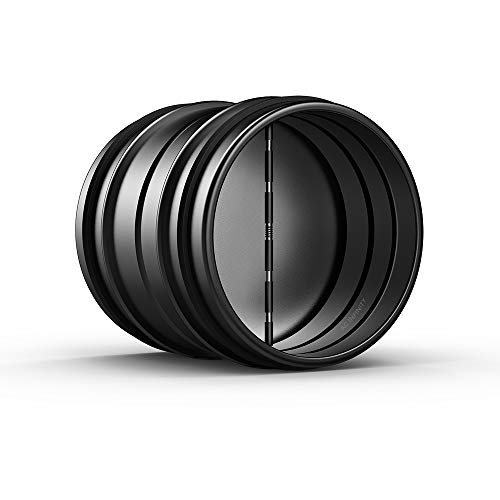
We recommend AC infinity dampers since they have durable rubber seals that prevent air leakage.
- An antidraft duct insert designed for use with range hoods, bathroom fans and other home HVAC applications.
- Features outer rubber gaskets that create an airtight seal and grip between the damper and ducts.
- Mounts horizontally or vertically to prevent backflow and debris from entering ducting.
- Galvanized steel body with spring-loaded aluminum damper blades that open with minimal airflow.
Last update on 2024-03-27 / Affiliate links / Images from Amazon Product Advertising API
Add Weight to Damper Flaps
Most dryer vent flaps are made of thin material such as thin sheet metal or plastic, which can easily be picked up by the wind. Adding more weight to these flaps can help keep them shut even on the windiest days. But be careful not to make them so heavy that they cannot open when they need to.
The best solution I’ve found for damper flaps is not coins or washers, but wheel weights (amazon link) since these are inexpensive, easy to use, and come with super-strong adhesive already applied. These weights are built to balance the wheels of a car, and they are buildable for however much weight is needed.
 | Stick-on Adhesive Tape | 144 Oz 576 Pcs")
It may pay to tape on the wheel weights to your damper flap before applying with adhesive, just to get a sense of how many you want to use. You want to make the flap easy enough to open from the exhaust of the dryer, but heavy enough to remain shut when it is windy.
Since the wheel weights must be durable enough to withstand all of the snow, wind, and sleet on the roads, you can rest assured they will be durable enough to withstand the wind coming into your dryer vent.
Find out how a similar solution can be applied to a noisy range hood vent.
Replace Damper With Better Quality Product
Check if the damper you’ve got seems of high quality or if it seems to be worn out. If it doesn’t seem like a high-quality product or looks like it’s become worn out over time, it is time to get a new damper.
Any easy way to switch out your existing damper with a higher quality product is to go for a spring-loaded damper, like that listed above.
Looking for butterfly dampers rather than single flaps will also help produce the most airtight seal and prevent backdraft into the vent. Since these are also often spring-loaded, they are some of the quietest options for dryer vent dampers out there.
")
A higher-quality damper can also mean a damper made of better material, such as choosing stainless steel over plastic. I also recommend choosing dampers with rubber edges that create a more air-tight seal than the traditional metal-on-metal system.
Find out more about ventilation dampers, including spring-loaded dampers, with this helpful guide.