Your bathroom exhaust fan is an unsung hero. These fans work silently to remove all excess moisture from our bathrooms and help eliminate odors and pathogens.
While they require periodic cleaning, bathroom exhaust fans can keep working for years, but just how long they last will be the subject of this article.
A bathroom exhaust fan can last up to 10 years with proper maintenance and care. To ensure their bathroom fans last as long as possible, homeowners should routinely clean their exhaust fan and avoid using it when not necessary.
In this article, we will evaluate some of these factors, as well as the signs that indicate you need to replace your bathroom exhaust fan.
What Affects a Bathroom Exhaust Fan’s Longevity?
A properly maintained bathroom exhaust fan can last 10 years after its original install, and there are ways that you can help extend its longevity.
These include keeping it clean, limiting run time, making sure you have the proper size fan, and making sure you have efficient ductwork.
Exhaust Fan and Vent Cleaning
As a responsible homeowner, you should include regular exhaust fan cleanings in your schedule. Exhaust fans and vents should be thoroughly cleaned once a year at a minimum.
Still, a lot of grime can build up in less than a year, so consider cleaning it twice a year or even more. Mark it in your calendar on the biannual daylight savings times if that help, that is what I do.
It isn’t just about keeping it tidy, though; you need to be aware of just how hard that fan is working too. Once a fan is sufficiently clogged, the motor has to work much harder and will not work nearly as efficiently.
Also, a clogged bathroom exhaust fan can be a fire hazard. When the fan’s motor gets too warm, it can ignite all the lint and dust it has been gathering.
Steps to Cleaning Your Exhaust Fan and Vent
Here I will go over how it should be done shortly, but If you want to read my detailed guide read my other article that discusses cleaning the bathroom fan in more detail.
The potential for such a hazard is why your bathroom fan should have regular, thorough cleanings instead of simply swiping a dusting wand across the vent cover. Invest the time for a thorough cleaning using the following steps.
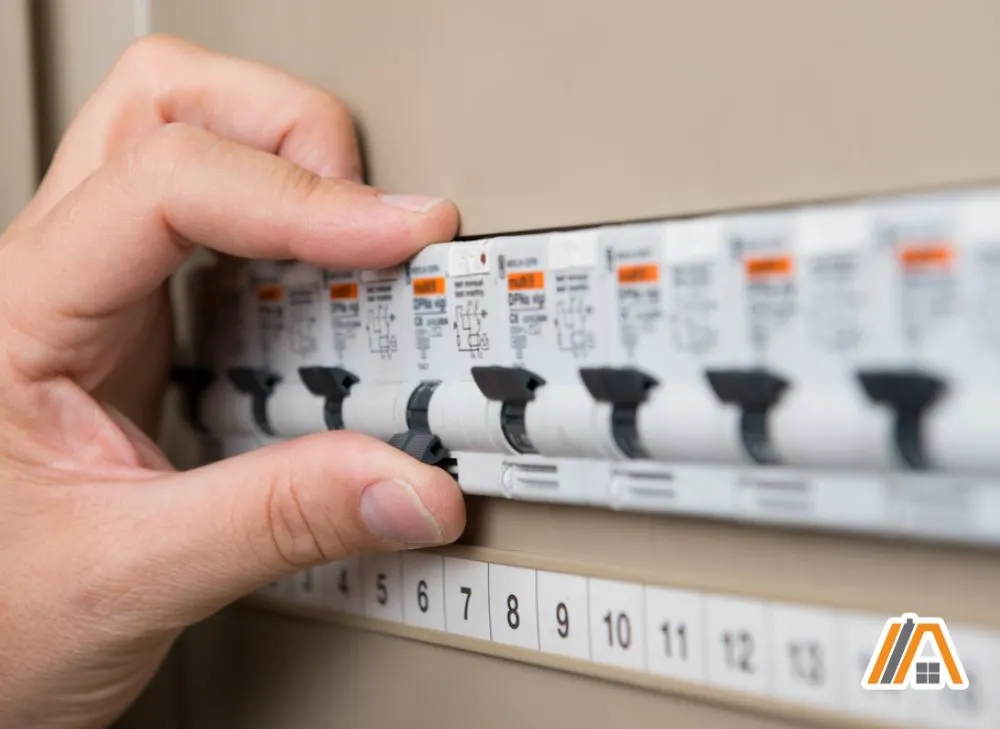
Before doing anything, you need to shut off all electrical power to the exhaust fan.

To begin, you will need to remove the vent cover, which is typically just a matter of removing a couple of screws. If your cover is secured with clips or mounting wires, squeeze them to lower the cover and then remove it.
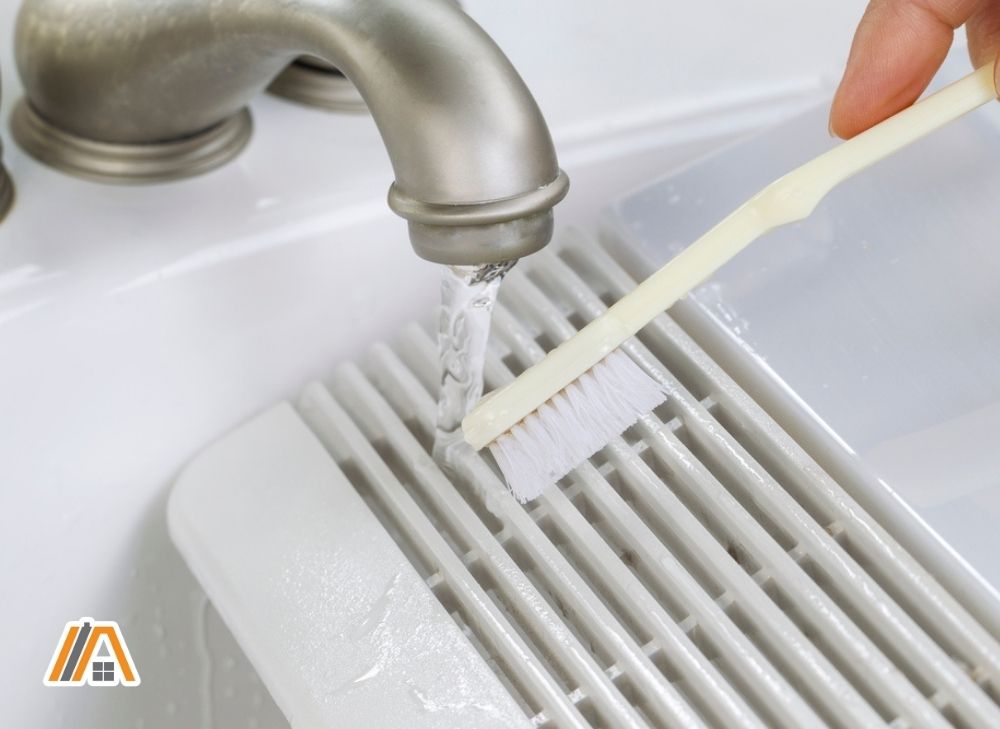
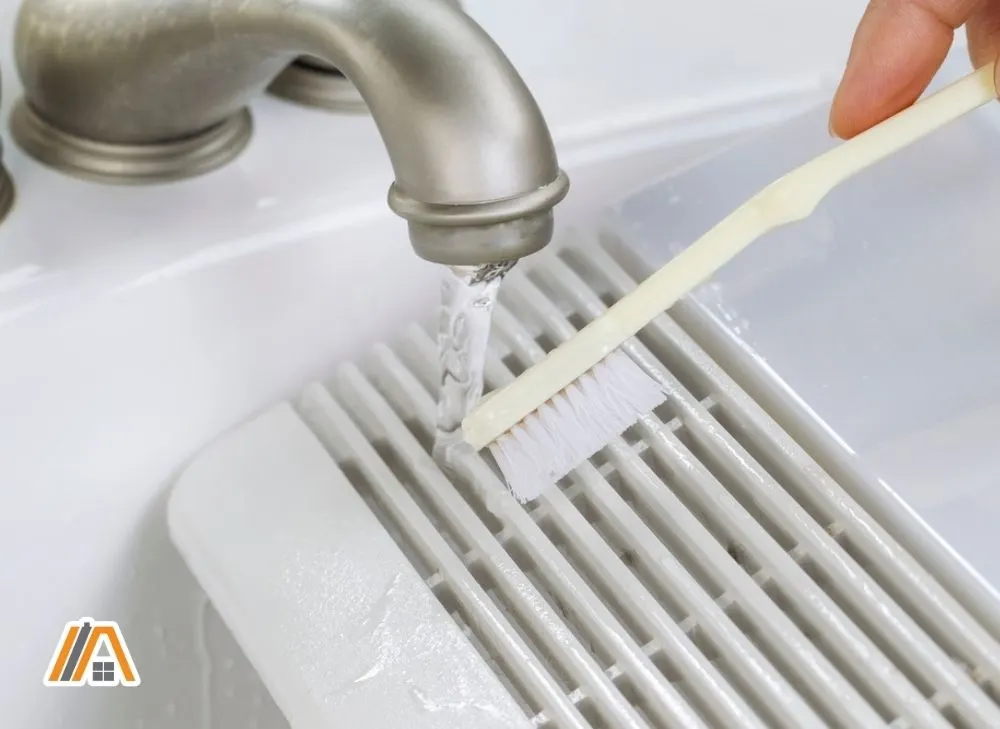
Place the vent cover on the floor or a counter. Using the vacuum wand attachment, suction up the dry dust on the vent cover.
Vent covers are made from metal or plastic, and the easiest way to deep clean them is with multi-surface cleaner and water. Using a sponge or rag, scrub to remove all grime.
Once the cover is squeaky clean, place it on a towel or a drying rack away from the bathroom. You will want the cover to be completely dry before putting it back up.
Before returning to the bathroom, double-check to make sure you have the right breaker turned off so that the exhaust fan is not receiving electricity. Doing this is critical since you’re about to stick vacuum attachments and your hand in the fan’s housing.
Carefully vacuum the dry dust on the fan using vacuum wand attachments or the brush vacuum attachment.
When you’ve sucked up all the dry dust, wipe down any remaining grime with a microfiber cloth. For a deep clean, you can remove the motor from its housing and clean every crevice with the microfiber cloth.
Once every part is clean and completely dry, you can reassemble the exhaust fan, including the wiring connections. After reassembling, flip the switch to check the fan is connected and working.
If you chose to take the fan motor out, make sure to observe any rust or discoloration. Depending on the state of the exhaust fan, you may need to replace the fan instead of just cleaning it.
We will discuss how you will know when to replace the fan as well as how to install a new one shortly.
Exhaust Fan Run Time
Homeowners also need to keep an eye on that exhaust fan when it runs. If it takes too long to power up or it sounds unusual, you could have a problem on your hands.
Likewise, don’t run the exhaust fan for longer than necessary — 20-60 minutes is usually all that’s required. (Check out my other article where I discuss this in more detail)
You should never leave an exhaust fan running longer than necessary and especially not overnight. During and after a bath or shower, the fan should run no longer than 60 minutes, which is more than enough time to dry up the average-sized bathroom.
If left on too long, the motor can overheat and can even set fire to your home.
Many firefighters who have seen this type of thing firsthand recommend that homeowners replace older exhaust fans with newer and safer models. Many of these new exhaust fans have thermal heat protection.
You can even install a unit that includes a timer that cuts the fan off automatically. These are a great option because they not only keep the motor from overheating, but they also help you save energy.
If you are looking for a timer switch head out to my list of top 9 timer switches.

Exhaust Fan CFM
Having an exhaust fan with enough power to vent the area of your bathroom correctly is essential as well. Fans are classified by CFM or cubic feet per minute, which designates the space the fan can clear or move in a minute. Check out my article about how bathroom fans are rated if you want to learn more.
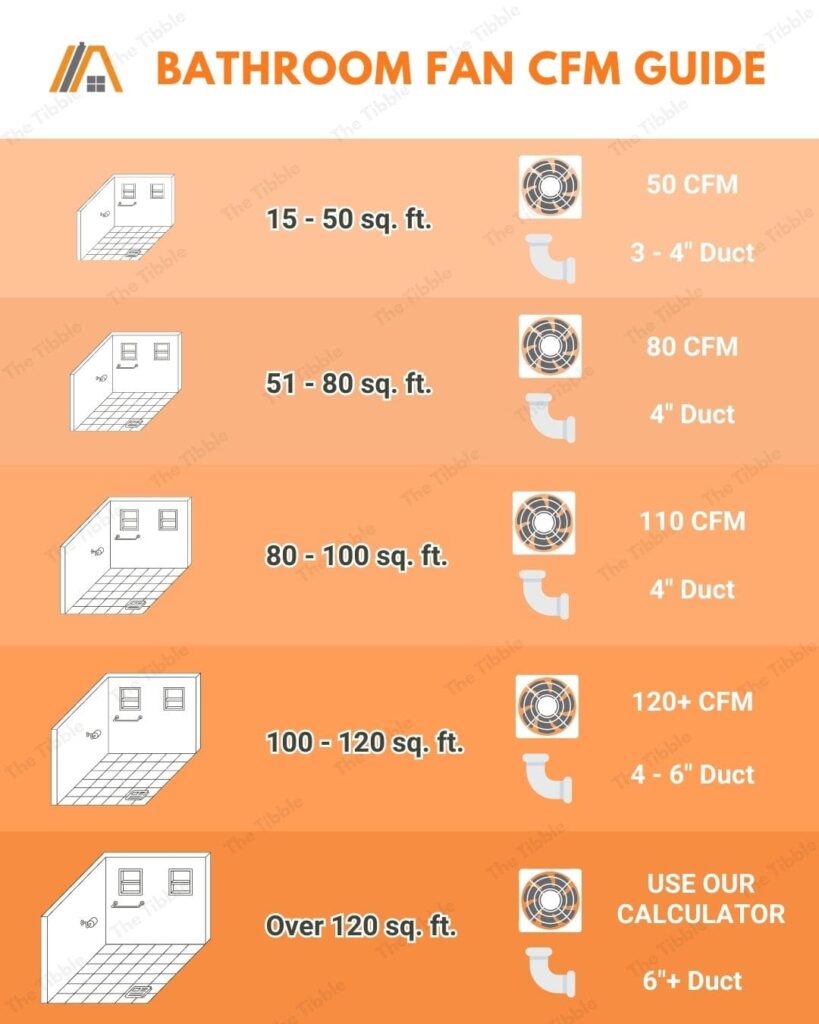
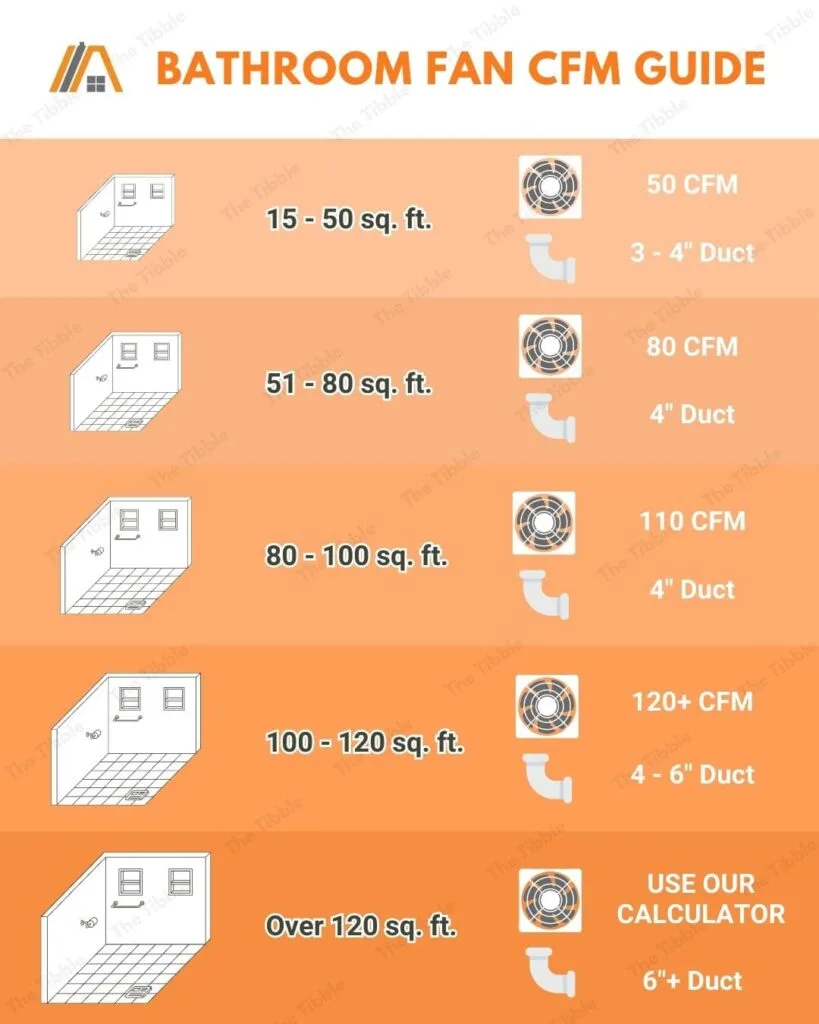
As bathroom size increases, so does the exhaust fan’s CFM requirements. If you installed a fan a couple of years ago, and you feel like it has never done a proper job of ventilating, you may have chosen a fan with too low of a CFM rating.
Small spaces that are under 100 square feet may need a CFM of only 50 or 100. Meanwhile, that same space with multiple fixtures, each requiring around 50 CFM, may need 150 to 250 CFM (source).
Ductwork and Damper Issues
Even if you follow all of the preceding advice, you can still have issues. Before rushing to replace your fan before its time, make sure you check your ductwork and damper.
It’s not unheard of for homeowners to find out their exhaust fan isn’t working at all during a bathroom renovation or a duct check.
The problem often lies in the duct system’s damper. A damper allows air to ventilate out but doesn’t let outside air travel in. When the fan cuts on, the damper opens to let the air out.
Your damper could be stuck in the closed position, so air is never actually ventilated out.
While you’re in inspecting mode, check the duct system connected to the fan.
One quick test to ensure you’re getting proper suction from your bathroom ventilation system is to hold a piece of toilet paper up the exhaust.
A properly working fan will suck up the toilet paper. If your fan isn’t holding on tightly to the paper, remove the unit from the ceiling and check its duct connection. You’ll probably find that it’s clogged, and you can clean those clogs with a soft brush.
Ensuring that your ductwork and damper are working properly will greatly increase your fan’s longevity. Let your fan work smarter, not harder.
Indicators that it’s Time to Change
If you’ve moved into your home within the last decade, there’s a strong chance you didn’t install the current exhaust fan in your current home, and you may not have any idea of the last time it was replaced, if ever.
It’s best to detect any issue before the fan has completely failed, so here are some ways to tell if your exhaust fan is nearing its end.
Noises
Don’t just dismiss any rattling or squeaking noises because they could be a sign that the motor is about to give out. A properly functioning fan should only make a low hum noise when in use. Check out my article about why bathroom fans get noisy if you want to learn more. Alternatively, if your fan is specifically making a buzzing or loud humming sound, you can go through my list of possible causes and solutions.
Slow Startup
Observe how long the fan takes to kick in fully. It should start up instantly, at the flick of a switch. If there’s a pause in between, then something is wrong.
Moisture Buildup
If your normally dry bathroom is suddenly moist all the time and even has a bit of an odor, your fan is probably nearing the end of its lifetime.


Strong Plastic Smell
Be particularly alert to the smell of burnt plastic, which could indicate a failing fan or an electrical problem that could blossom into a full-fledged fire hazard. It’s time to replace it immediately (source).
If any of the above sounds like your bathroom exhaust fan, it’s time to start shopping for a new one. Unfortunately, exhaust fans don’t have printed expiration dates.
To know when to change an exhaust fan with an unknown install date, you’ll need to keep a note of just how your fan is operating every time you go to your bathroom so you can catch a problem before it starts.
Things to Consider Before Installing an Exhaust Fan
Before you go any further go and check my article where I discuss how to change only the motor. Since this is often the best solution.
You’ve figured out you have a noisy and outdated exhaust fan, and it’s time for a new one. Now you’re wondering if an exhaust fan installation is a do-it-yourself project.
While it is possible, it will depend on what the existing exhaust fan is like, what kind of fan you want to put in, and your personal experience with electrical work.
Electrical work should always be done by an experienced, licensed professional to ensure the wiring is done per local codes. Since electricity can be hazardous to work with, calling a professional would certainly be in your best interest.
On the other hand, if you know your way around some wiring, you can give replacing your exhaust fan a shot.
If you are looking for a more detailed assessment and comparison on who should replace your bathroom fan, you can find all the information you need to know in my article on who to hire for bathroom fan replacements.
Bathroom Fan Housing Size
The most important thing is the actual physical size of the fan. By replacing it with a fan that is similar to the one you have now you save yourself a lot trouble.
It is best to measure the opening and find a fan with a similar size housing. Bathroom fans are not standard size as I discuss in my previous article.
Replacing an Existing Exhaust Fan
Upgrading Your Exhaust Fan
If this is your first time purchasing an exhaust fan, there are a few things you should know first. You should consider the CFM rating, as we discussed earlier, but you should also check into the sones rating on fans.
A sones rating is the measurement of how loud the fan is. In sones, 1 is considered quiet, while 2 is the standard level. You can learn more about sone ratings here.
You can find a Sone to Decibel calculator here
As you shop for a new exhaust fan, also look into some handy features included in some modern versions. If you have to replace the fan anyway, you might as well upgrade. Some exhaust fans have:
- An attached light
- A nightlight
- A timer
- A humidity sensor
- Bluetooth connectivity
- Adjustable fan speeds
- A speaker to play music
- Thermal heat protection
![[New Generation] Humidity Sensor Switch, Ortis in-Wall Bathroom Fan Automated Control Switch, Air Moisture Detection, Neutral Wire Required, White, 120V/220V](https://m.media-amazon.com/images/I/41u0-SbFNZL._SL500_.jpg "[New Generation] Humidity Sensor Switch, Ortis in-Wall Bathroom Fan Automated Control Switch, Air Moisture Detection, Neutral Wire Required, White, 120V/220V")
Here I have a list of 8 super quiet bathroom fans. They are truly the quietest on the market today and I will keep this list updated.
An upgraded exhaust fan is a nice improvement to the home, but please be aware that some of these features may require extra electrical work. For example, a light and exhaust combination may need an additional light switch installed.
Replacing the Old Fan
To install a new fan, you will first need to remove your existing exhaust fan. For a quick how-to, follow these steps. (I have an article dedicated to how to remove the bathroom fan if you want a more in-depth guide)
As when cleaning the exhaust fan, make sure the appropriate breaker is switch off before you attempt to remove anything. Take off the cover like before, whether attached by screws or clasps.
After the cover is off, remove the motor from the housing in your ceiling or wall. Once you’re in the housing, reach in and disconnect the wiring that gives power to the motor.
You will need to remove the housing next, which is normally screw-mounted in and can just be unscrewed and removed. Some fans are held in place with brackets that make it more difficult to take out the housing.
As you slowly pull the housing out, also disconnect any wiring connected to it. Now remove the housing from its connection to the duct and remove the housing entirely.
All exhaust fans are different, but all come with their own set of instructions. It’s best to review your selected fan’s directions carefully before attempting anything.

If your new exhaust fan is the same size as the older one, then installing the new fan is simply a matter of reversing these steps.
Potential Problems
When installing a new exhaust fan, you may have to expand the existing hole in your ceiling for a larger exhaust fan or even add filling to accommodate a smaller one. You will also need to reconnect to the house’s duct and electrical systems.
You may run into some tricky issues if your home is an older build. The owners prior to you may not have properly installed the unit, and you realize now that it isn’t even ventilating to the outside but, instead, into the attic.
Suddenly, this install is a much more complicated job. If your fan isn’t vented, you’ll need to install a vent through the roof or the wall of your house. If you have an attic, never vent directly into the attic itself.
The bathroom fan should never be vented to the attic!
When you run ductwork anywhere, connect the duct or hose to your fan unit with HVAC tape. You will want to properly insulate the ductwork to prevent the buildup of condensation as this will result in water dripping from the bathroom fan and ruining the drywall.
Minimizing the length of the ductwork and the number of bends will reduce condensation risks and reduce how hard your exhaust fan has to work to pump air out.
If you don’t feel comfortable cutting holes in your wall or roof for your vent, just call a professional. An improperly cut vent hole and poorly sealed vents will require further maintenance at some point and could cause serious damage to your home.
Cutting through masonry for a wall vent can be particularly challenging, and you want to make sure you don’t cut through any electrical or plumbing lines.
Final Thoughts
Bathroom exhaust fans can last a surprising 10 years if properly maintained. In that decade, they will keep your bathroom dry and keep the mold and insects at bay.
After that 10-year mark, you’re more likely to notice some signs of failure, like clanking sounds, a foggy bathroom, or even a burning odor — a sign that it’s become a fire hazard.
You should clean exhaust fans once a year at a minimum, but twice a year is even better. Also, it shouldn’t be left running for long periods to avoid overheating and a potential fire.
As long as you have the proper exhaust fan installed for your bathroom’s size as well as quality ductwork, there’s no reason your bathroom fan shouldn’t last for the full 10 years.