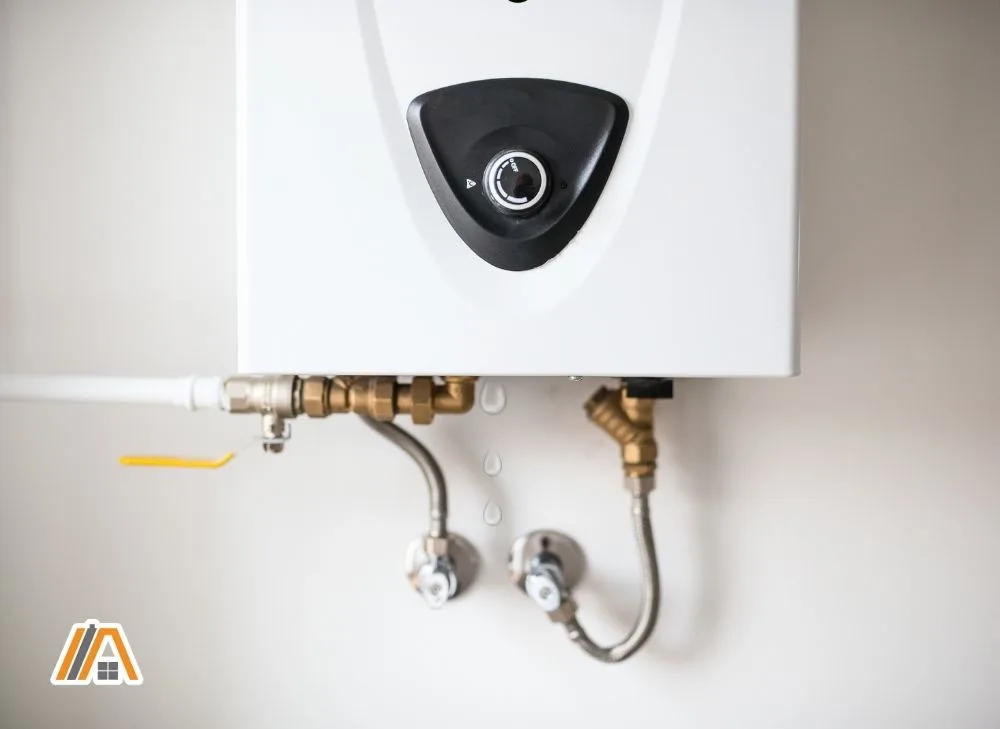
The other day, I walked past my water heater and noticed some water on the floor around it. I went to go investigate and found that the leak was coming from the water heater itself. Now, I had done quite an intense workout that day, and I was looking forward to my shower very much. This eager anticipation was now dulled by visions of my house flooding with water as soon as I turned on the tap.
After dithering for an acceptable amount of time, I made myself a coffee and sat down to do a spot of research. In the end, I had my shower, but I also got on the phone with a plumber the next day. In this article, I will share with you why.


In general, it’s fine to shower a few times when the water heater is leaking. Long-term, leaks must be repaired as cracks get bigger, fittings looser, and water damage worsens. Don’t use the shower if the leak is substantial, has the potential to affect electrics, or the water heater is kept in the ceiling.
Taking a Few Showers Should Be Fine
Typically, taking a few showers before you can get your leaking water heater fixed is fine. Because of the way water heaters are designed, the leak will usually be small.
However, just as with most other appliances, putting a broken water heater to continual use could make the problem (in this case, the leak) worse. For this reason, it is best to try to get the water heater fixed as soon as possible. The likelihood of furthering your problems increases with every shower.
Now, I did say typically. Sometimes, it’s better not to use the shower at all until a plumber takes a look at it and/or repairs it.
The cause of the leak will determine whether it is okay to shower with a leaking water heater or not. The leak’s source will also affect what further problems could arise from long-term use.

Why Do Water Heaters Leak?
Water Supply Line Issues
In order for a water heater to work, it needs to be fed a supply of water. “Water supply line” refers to the hose that the water is fed through, supplying the water heater. The hose is usually made of flexible aluminum but might also be a rigid metal tube.
The water supply line is situated above the rest of the water heater. Water from a leak in the water supply line sometimes drips down and lands on top of the water heater, making it appear like there is a leak in the actual tank.
Solution
If you can locate the point at which the leak originates, you can temporarily patch the leaking water supply line with some plumbers tape, but the real solution is to replace it.
Replacing a water heater supply line is quite simple. To do so:
- Turn off the water heater by shutting down the gas for gas heaters, or the electricity for electric heaters.
- With this done, cut off the water to the heater. You will do so by using the shutoff valve located on the cold water pipe connected to the tank.
- You can make sure the water is cut off by trying to use hot water from a faucet. There should be no flow. If there is, leave the faucet open for a few seconds. The flow should slow or stop. This is important in releasing any pressure that exists in the hot water pipes.
- Unscrew the leaking water supply line, and screw in the new one.
Here is a helpful video:
Leaking Fittings
The fittings on a water heater are relatively small pieces of metal that connect each end of the supply line hose to the tank. You can think about them as an adapter.
Fittings can crack or get corroded over time. When this happens, water will leak from them.
Sometimes it is tricky to differentiate whether a leak is coming from the supply line or a fitting. Replacing fittings is more difficult than replacing a supply line hose. So if you can’t tell which is the source of the leak, it is best to try replacing the supply line first.
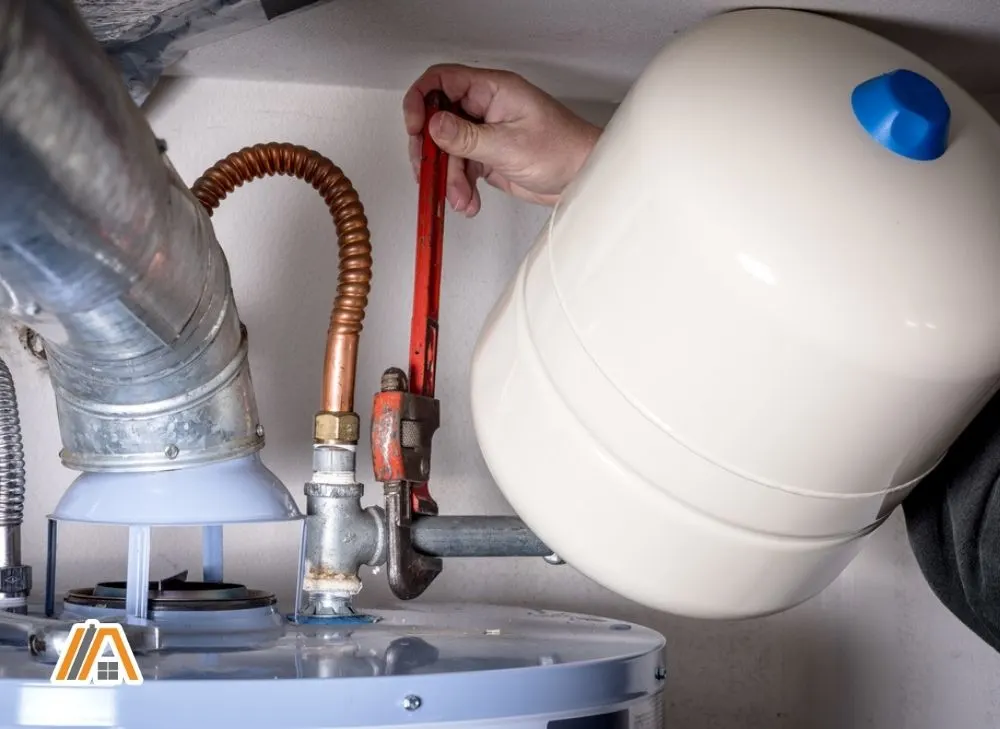
Solution
Sometimes, just tightening the fitting will solve the problem but if it doesn’t you can replace it.
Replacing fittings will require a pipe wrench (amazon link). So, if you have ruled out a leak in the supply line hose, then to replace a fitting you will:
- Turn off the gas or electricity to your water heater.
- Cut off the water to the heater.
- Open a hot faucet to drain the residual pressure in the pipes.
- Unscrew the hose from the fitting.
- Try to unscrew the fitting from the tank by securing the pipe wrench firmly to the fitting, and pulling hard. If it does not budge after a few efforts, it is best to call a professional, as breaking the fitting will result in a bigger problem.
- It is recommended to apply some Teflon tape over the thread of the new fitting. This is also a recommendation for when installing anode rods and the reasoning is the same. You can find this reasoning in my article: Should You Use Teflon Tape on Anode Rod?
- If you have successfully unscrewed the fitting, simply screw in a new one snugly to the water heater, and attach the hose to the other end. (The directions will tell you which end goes into the heater.)
Temperature and Pressure Valve Issues
If the temperature or pressure inside a water heater tank gets too high, the temperature and pressure valve will release water, to prevent an explosion.
A problem with the temperature and pressure valve should be taken a little more seriously than a small leak in the supply line. The temperature and pressure valve is an extremely important safety feature of your water heater. You want it to be working flawlessly.
A temperature and pressure valve might cause a leak because it was installed improperly, or because there is too much pressure in the tank. In very rare cases, the valve can also cause a leak because temperatures are too high.
Solution
Sometimes, jiggling the valve will stop the leak because it’s just didn’t close properly after it automatically opened to relieve some of the pressure. If that doesn’t work, it will need to be replaced.
To replace a temperature and pressure valve:
- Turn off the gas or electricity and water to the water heater.
- Open a hot water faucet until the flow stops.
- Drain off some of the water from the tank (be careful—it’s very hot water!). To do this, you unscrew the drain valve cap (located at the bottom of the water heater), attach a garden hose, and open the valve. Make sure the water leads to a place that can safely handle hot water. You want to run off enough water that the water line falls below the temperature and pressure relief valve.
- Remove any discharge tubing from the temperature and pressure valve.
- Using a pipe wrench, unscrew the temperature and pressure valve.
- Screw on a new one and reattach the discharge tubing.
Below is a very simple and helpful video for this process.
Drain Valve Problems
The drain valve is another possible source of a leak. As illustrated above, drain valves are useful for maintenance to drain the tank of either water or sediment.
The water level in a water heater tank is always above the drain valve. So, any weakness will undoubtedly result in a leak.
Similar to fittings, a drain valve will usually leak due to corrosion or cracking.
Solution
Replacing a drain valve is relatively straightforward:
- Cut the gas or electricity and water to the water heater.
- Unscrew the cap to the drain valve located at the bottom of the tank.
- Screw on a garden hose, and open the valve to drain all the water you can to a place that can safely handle the hot water.
- With the tank empty, use a wrench to unscrew the drain valve.
- Apply Teflon tape over the thread of the new drain valve.
- Screw on the new drain valve until tight.
- Refill the tank by opening the cold water supply, and turn either the gas or electricity on back to the water heater.
The video below is a really helpful and detailed visual demonstration of this process that I recommend watching before attempting your own drain valve replacement.
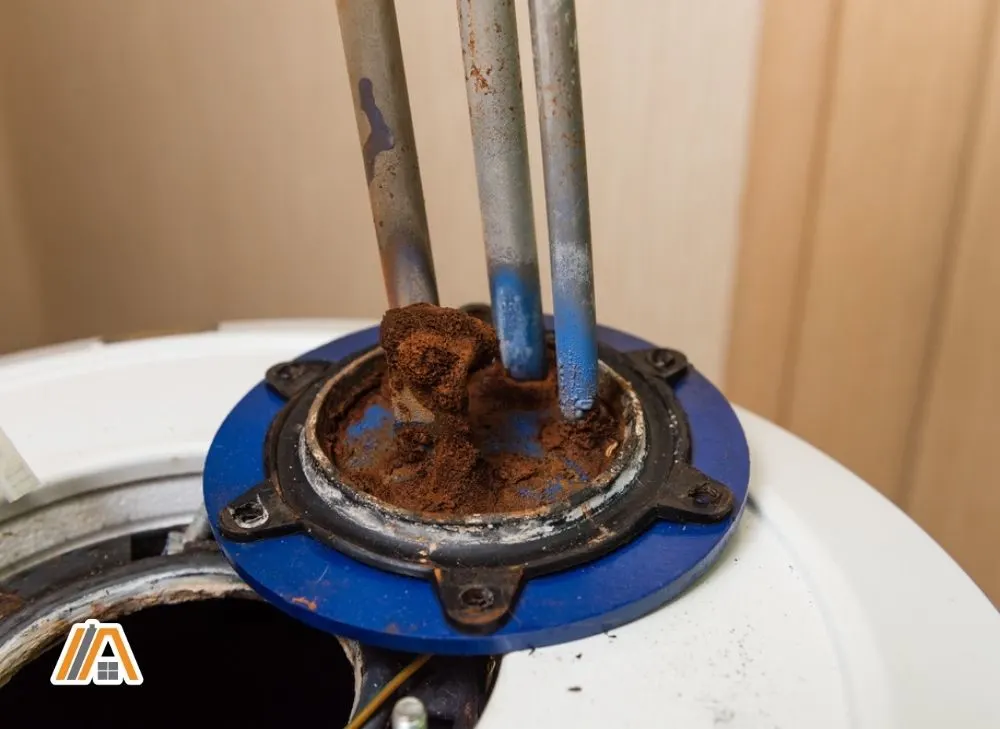
Rusted or Cracked Tank
It is important not to mistake discoloration for rust. Sediment sometimes builds up inside the tank, which from the outside can be mistaken for rust. In this case, a technician can most likely fix this problem by flushing the tank.
It sometimes happens that minerals in the water corrode the metal tank. Anode rods are supposed to prevent this, but if they are not replaced regularly enough, the tank will corrode.
Corrosion and pressure can cause a tank to crack. If you see a crack in the actual tank of the water heater, there is not much you can do.
Solution
Fixing a rusted water tank is a lost cause. A water tank with rust in it contaminates your entire water supply and must be replaced.

A cracked water tank has no solution either. If your water heater tank is cracked, it must be replaced.
If your water heater is cracked or rusted, then you should read through these articles to help you choose your new water heater:
- Glass Lined Water Heater vs Stainless Steel: Which is best?
- Longer Water Heater Warranty: Is it really worth it?
Using the Shower Long-Term Before Repair: Issues
If you just accept the leak as something that your water heater does and you carry on using it long-term, then you will worsen the leak and reduce the lifespan of your water heater.
Cracks Get Bigger
As was said above, pressure is one of the elements that can create a cracked tank in the first place. It follows that pressure from the water inside the tank will only make the existing crack bigger.
Pressure will expand a crack easier and faster than it creates one. This is why using a water heater with a cracked tank long-term is not a good idea.
Fittings Become Looser
Long-term use of a water heater with a leaking fitting will surely only make your fittings even looser.
Remember that fittings act as an adapter to the main supply of water that flows into the tank of a water heater. The constant pressure from the flowing water will accelerate the corrosion of a fitting and make the leak even worse.
Furthermore, if you have water constantly running over the metal fittings, they will soon corrode.
Water Causes Damage
Focused on the malfunction of your water heater, it is easy to forget that water itself in the wrong places can lead to damage.
The water leaking from your water heater has to end up somewhere. The inside of a water heater tank has an anode to protect the metal from water. The outside of your water tank, however, has no anode.

Because of this, water dripping down the side of the tank over long periods of time can rust the tank, which would damage it beyond repair.
On top of this, if the water drips all the way down the tank, your floor and walls can grow mold and get water damaged. Not to mention any electrical wires and fittings that the water may come into contact with.
When to Fix the Leak Before Using the Shower
Extensive Leaks
A substantial leak from a water heater likely indicates a more urgent problem, and it is best to diagnose and fix the problem before using the shower.
An extensive leak could be the result of water trying to escape rapidly to relieve high pressures inside the tank. Although rare, this could result in your tank bursting, which is extremely dangerous. Built up pressure could also cause pipes to burst; another serious issue.
If the leak is significant, then the water level may fall so low that the heating elements are exposed. Dry heating elements burn out and are a fire risk.
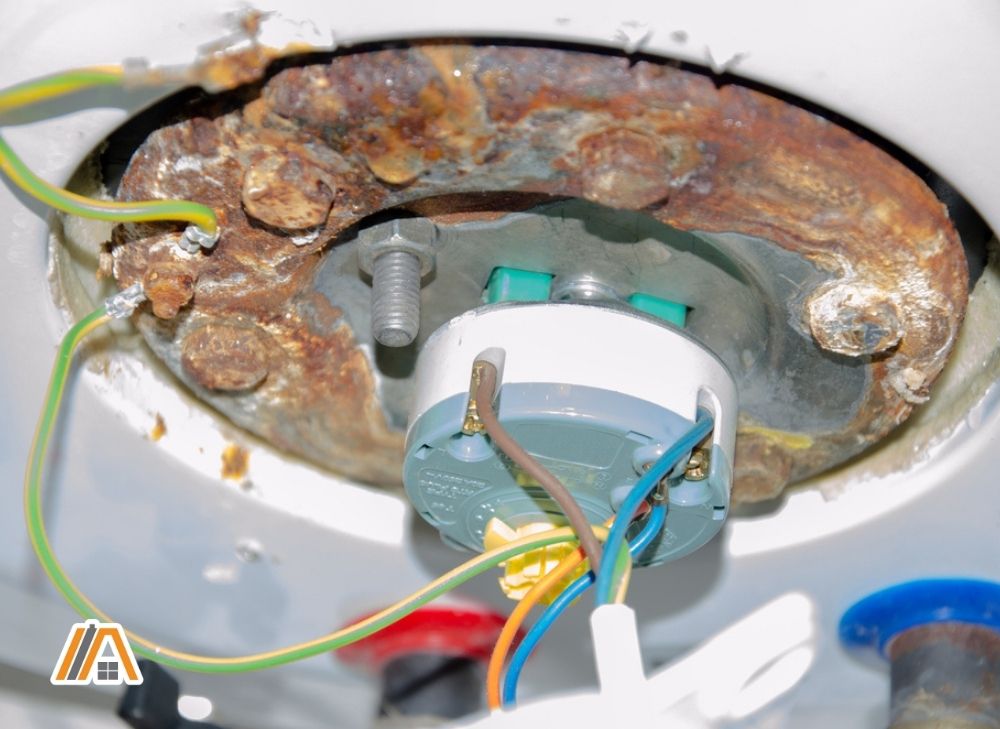
Water May Contact Electrical Equipment
Water heaters should be kept a safe distance away from any outlets. It can sometimes happen that water from a leak travels far enough to come into contact with an outlet or any other electrical equipment.

Water heaters themselves also have wiring inside of them. While water heaters are designed to protect this wiring from water, a large enough internal leak in the wrong place could get this wiring wet, resulting in a very dangerous situation.
In either of these cases, it is best to hold off on using your shower until the problem is fixed.
The Water Heater Is in the Ceiling
Some water heaters are installed in an attic or in another upstairs location. This placement can be advantageous but only in the right conditions.
A water heater located in the ceiling under the wrong conditions, however, is more sensitive to problems. Therefore, if your water heater is in the ceiling, it is more susceptible to a serious problem like bursting, and you should probably fix the problem before using the shower.
Sources
https://www.thespruce.com/how-to-fix-leaking-water-heater-2719073
https://www.youtube.com/watch?v=b9jRwXVJlIo
https://www.youtube.com/watch?v=2qhsmSbQQzc
https://acbyj.com/cracked-water-heater/
https://thomasgalbraith.com/knowledge-center/water-heater-leaks-cincinnati/