The order of certain things makes a huge difference in the outcome. For example, imagine eating a burger with the meat and tomato on the outside and the bread in the middle. It would be a sloppy mess! Your home would also be a mess if the layers that make up your walls were not assembled properly.
When covering insulation with plastic, the location is crucial to proper functioning.


Plastic acts as a vapor barrier for insulation and should be installed on the interior side. It must be properly secured so that there are no gaps that allow airflow. Do not put plastic on the outside of insulation, and make sure the materials used to seal it are also waterproof (i.e., not duct tape).
Plastic Acts as a Vapor Barrier
Plastic acts as a vapor barrier for insulation. A vapor barrier is a material that prevents the diffusion of moisture through walls, ceilings, and floors.
Insulation needs a vapor barrier because it is not vapor-proof or waterproof on its own. People often assume that since insulation stops conductive heat transfer, it also prevents any airflow from passing through. However, airflow and heat flow are two separate issues.
Cellulose and fiberglass are the two most common materials used to make cavity insulation. Under the standards of the Air Barrier Association of America, neither of these materials is categorized as air barriers.

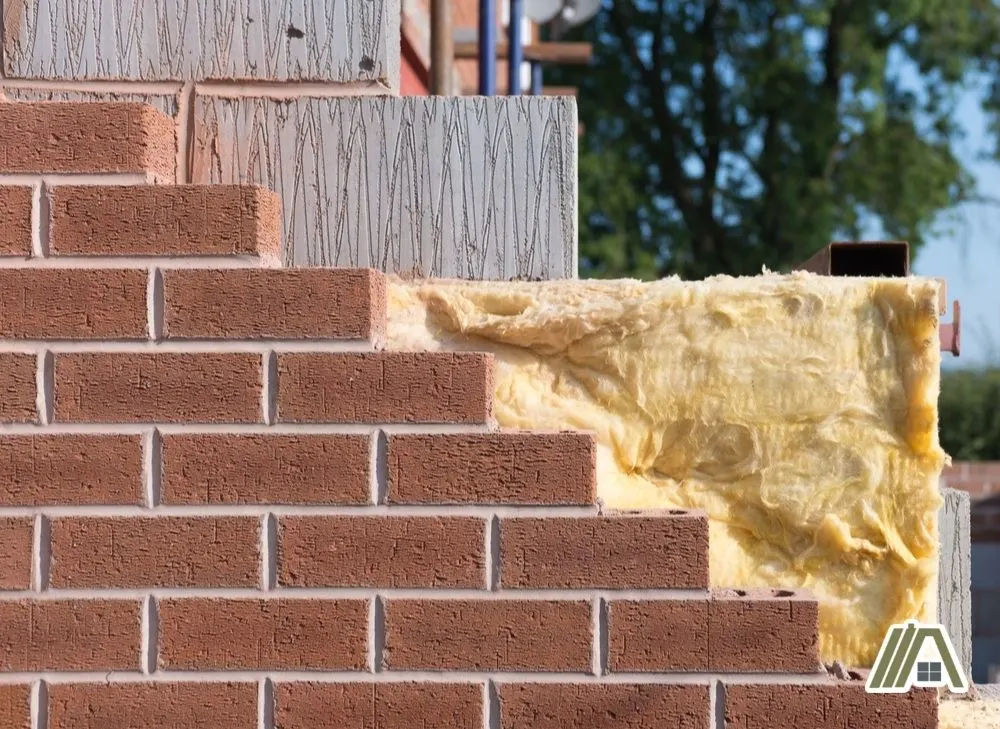
Cellulose slows airflow down more than fiberglass does, but neither are effective enough to be considered a vapor barrier. Thus, a plastic vapor barrier must be used in addition to insulation in order to create a proper barrier against moisture.
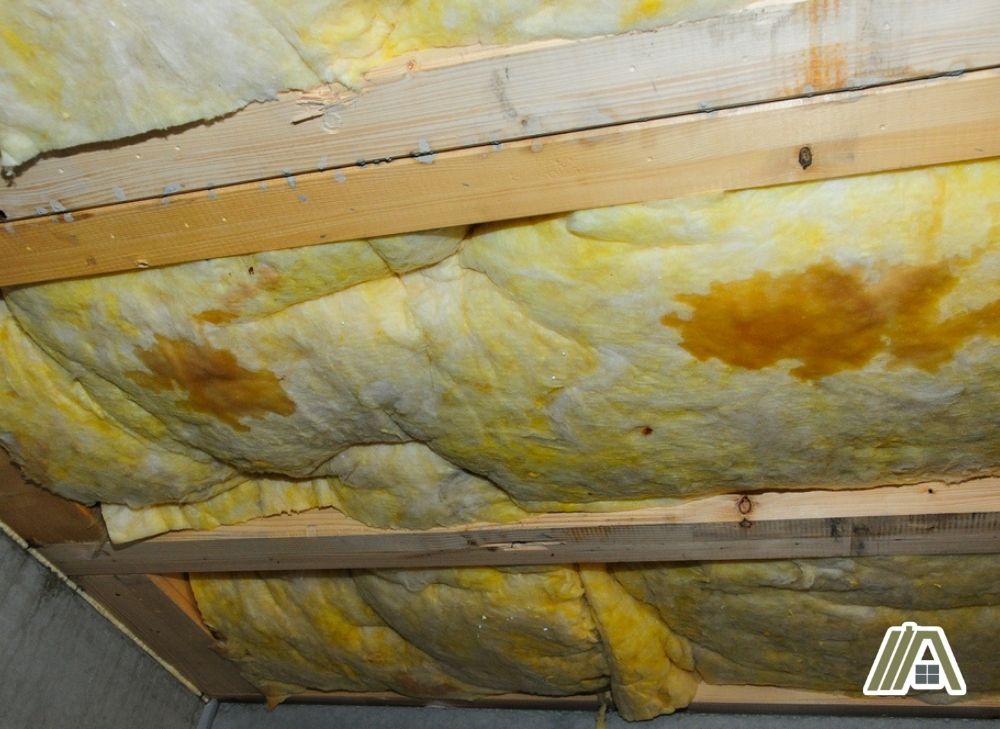
If a proper vapor barrier is not present, moisture can cause problems within the insulation itself by lowering its ability to properly regulate the temperature of your home.
The moisture could also migrate all the way through the insulation and cause damage to the drywall and wood framing of the house.
A third relevant issue is the growth of mold.
Installing a vapor barrier is the easiest way to prevent moisture in the air from causing damage to your home.
Do’s of Covering Insulation with Plastic
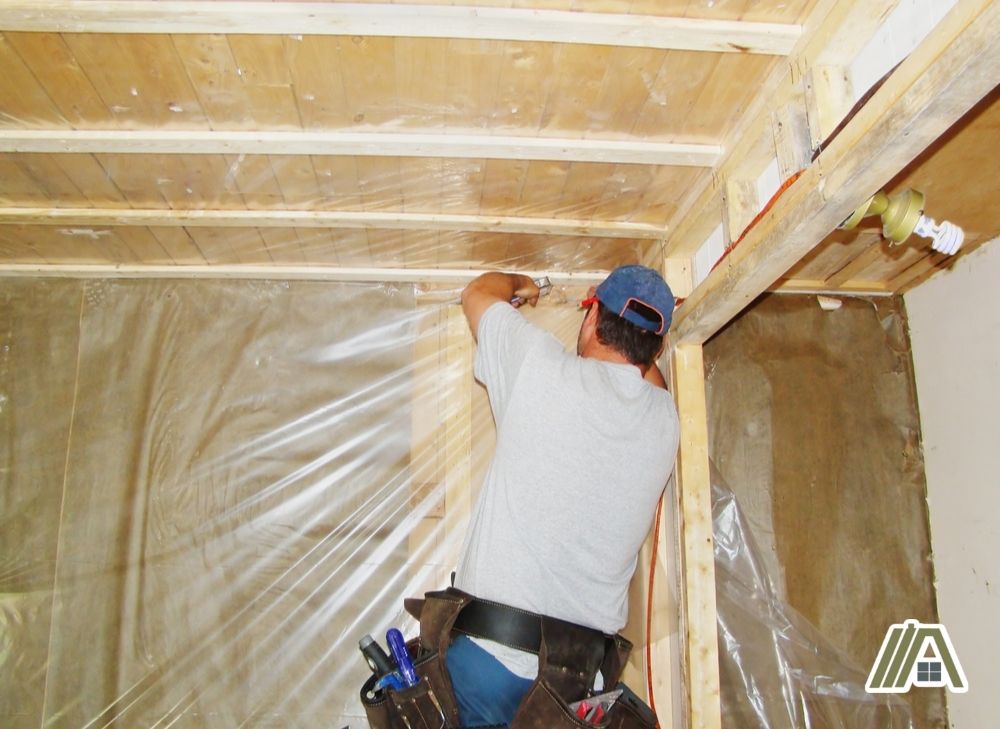
Install Plastic on the Inside
You should install plastic on the inside of the insulation. During colder months, the inside of the insulation is the warmer side. If warm air is allowed to pass through the insulation, it will gradually become colder as it travels to the exterior of the house.

Cold air is not able to hold as much moisture as warm air, so some of the moisture that was previously carried as water vapor will condense into liquid water. The cool air then exits through the walls and leaves condensation behind.
The condensation has effectively come into contact with your insulation and will now start doing damage to the insulation and surrounding materials.
This whole process is prevented by installing a vapor barrier on the interior side of the insulation. If the warm air cannot pass through the walls in the first place, it cannot cool down and leave condensation behind.
You do not need to install plastic on the exterior side because it is protected by the waterproofing of the actual house. This waterproofing already serves as a vapor barrier for the insulation.
Choose the Correct Product
When looking into what vapor barrier you should get, there are a few key differences among materials that you should be aware of.
The effectiveness of a vapor barrier is measured by its water vapor transmission rate, more simply known as permeance.
Water vapor permeance is technically defined as nanograms of water vapor per second per square meter per Pascal (ng/(Pa·s·m2). We’re going to use the simpler unit “perms” to categorize vapor barriers.
The International Residential Code (IRC) separates vapor barriers into three classes (Class I, II, and III) depending on their permeance.
Class I vapor barriers are very resistant to diffusion of water vapor. They must have a permeance of 0.1 perms or less. Examples of Class I vapor barriers include:
- Sheet polyethylene
- Sheet metal
- Non-perforated aluminum foil
- Foil scrim kraft paper-backed aluminum
Class II vapor barriers must have a permeance of greater than 0.1 perms and less than 1.0 perm. Examples of Class II vapor barriers include:
- Asphalt-impregnated or asphalt-coated kraft paper
- Unfaced expanded polystyrene
- Fiber-faced polyisocyanurate
Note: Some insulation types act as Class II vapor retarders, e.g., rockwool and kraft-faced fiberglass batts.
Class III vapor barriers must have a permeance between 1.0 perm and 10 perms. Examples of Class III vapor barriers include:
- Latex or enamel paint
- Gypsum board
The type of vapor barrier you need depends on the climate that you live in. Section R702.7(2) in the IRC contains a handy table outlining what vapor barriers are appropriate for your climate.


Get the Correct Size
The fewer folds or seams you need to make in your vapor barrier, the better. Folds and seams are the most common places where vapor barriers become compromised, so limiting these areas is ideal.
To do this, you’ll need to pick out a product of the correct size. Vapor barrier products are sold in a variety of sizes in store—the most common widths being four or six feet. With these dimensions, you should be able to run two sheets horizontally on the wall.
The standard wall height used to be eight feet, but now nine-foot ceilings are becoming increasingly common in homes. And, of course, even taller ceilings are also found quite often. If your ceilings are taller than 8 feet, you’ll want to buy a wider roll to limit the number of seams you’ll need to make.
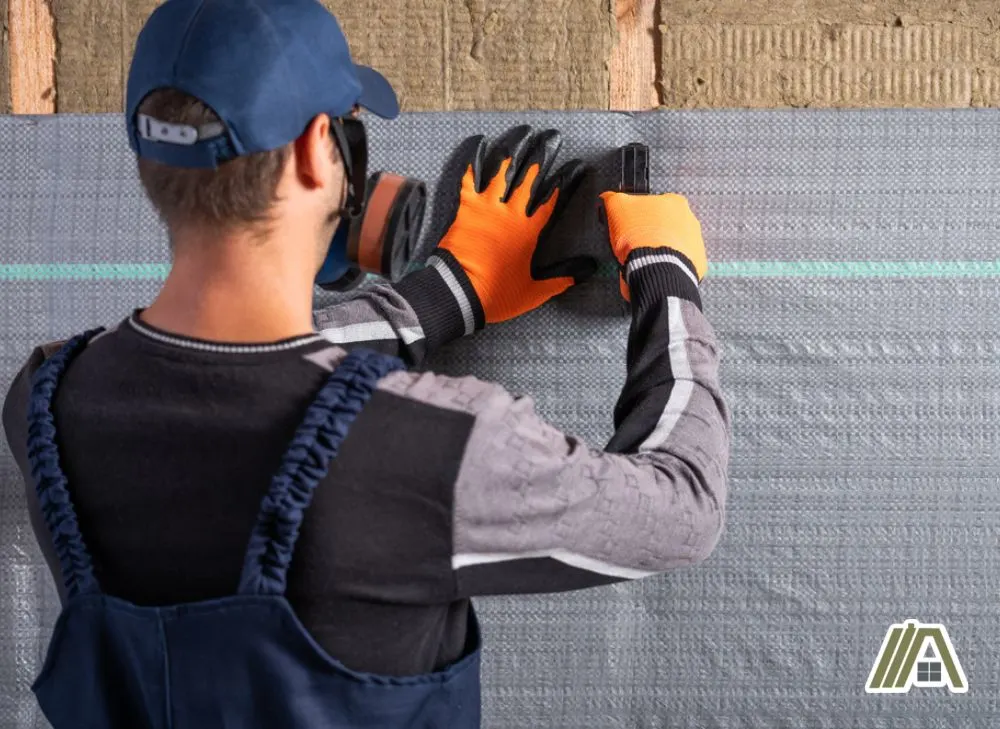
Secure the Plastic Appropriately
The plastic vapor barrier must be properly secured to the insulation and surrounding walls; if it were to detach from the surface, vapor could then pass through and render the vapor barrier useless.
There are two main techniques used to secure vapor barriers.
The first method, which is arguably easier and less messy, is to use tape. First, the vapor barrier should overlap at points where two sheets connect. You can then use a two-sided butyl tape to create an airtight seal.

The remaining free edge of the vapor barrier is also sealed with waterproof acrylic seam tape. Completing these steps doubly ensures that the vapor barrier is properly secured.
The second method is to staple the vapor barrier to studs in the wall every 12 to 16 inches. The staples create small holes in the vapor barrier, which can allow air to pass through if they are not properly sealed. The stapled areas should be sealed with caulk.

You may choose to use both staples and tape when installing your vapor barrier, as staples more securely attach the vapor barrier to the wall but tape is an easier and more effective sealant.
Ensure There Are No Gaps
It is of utmost importance that your vapor barrier has no gaps when it is installed, as any gap causes the whole project to be unsuccessful. Vapor will find any small open space in the barrier and come into contact with the insulation.
Your insulation is now subject to moisture despite the rest of the vapor barrier. This small gap will cost you very much in the future, as the entire vapor barrier and insulation may need to be redone in extreme cases of water damage.
As mentioned above, it is recommended that you overlap the vapor barrier sheets at connection points. This ensures that the two fully cover each other and leave no gaps in between.
Don’ts of Covering Insulation with Plastic
Never Use Plastic on the Outside
Installing a vapor barrier on the wrong side of the insulation can actually cause more damage than having no vapor barrier at all. Plastic that is installed on the outside of insulation will trap moisture instead of preventing it from entering.
The warm, moisture-filled air from inside your house is still able to travel through the insulation, leaving condensation behind. Now, when it gets to the exterior side, the air has nowhere to go. It ends up leaving even more moisture behind as it is unable to escape from your walls.
A plastic vapor barrier is unnecessary on the outside of your house because contractors should have already waterproofed the exterior during construction. This is a completely separate process from installing a vapor barrier for your insulation.
Avoid Using Duct Tape
Although duct tape is water-resistant, it is not waterproof. Duct tape does not create an effective vapor barrier and should not be used for the vapor barrier itself or for securing gaps between sheets of the vapor barrier material.
Duct tape consists of three layers: the top layer is made of polyethylene, a fabric mesh inner layer for additional strength, and a rubber-based adhesive layer on the bottom.
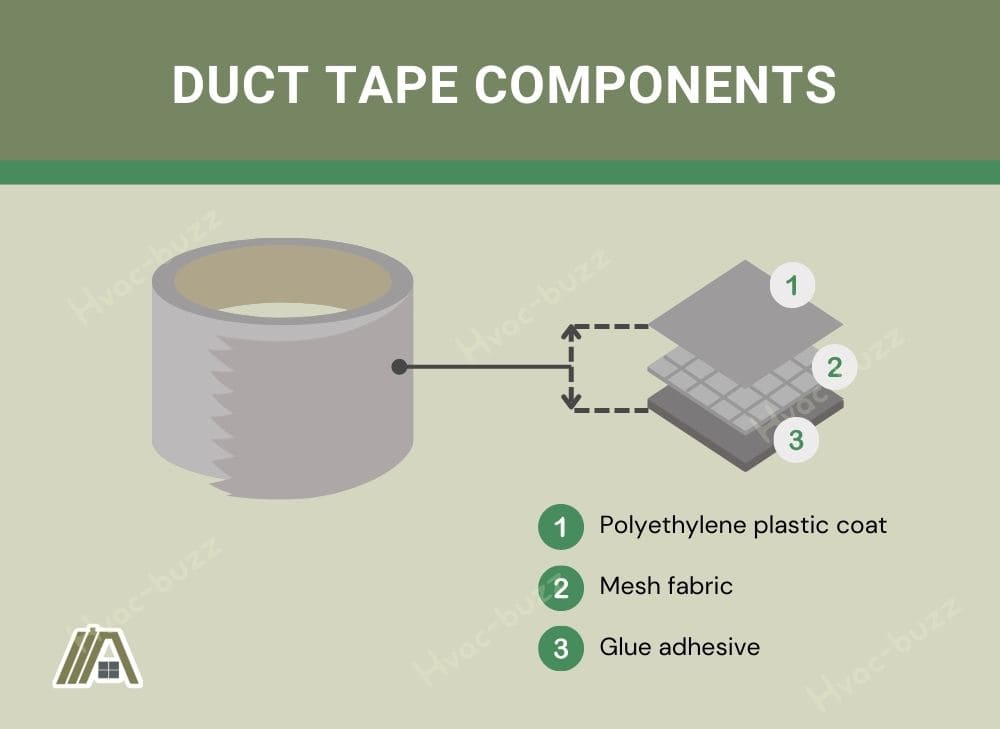
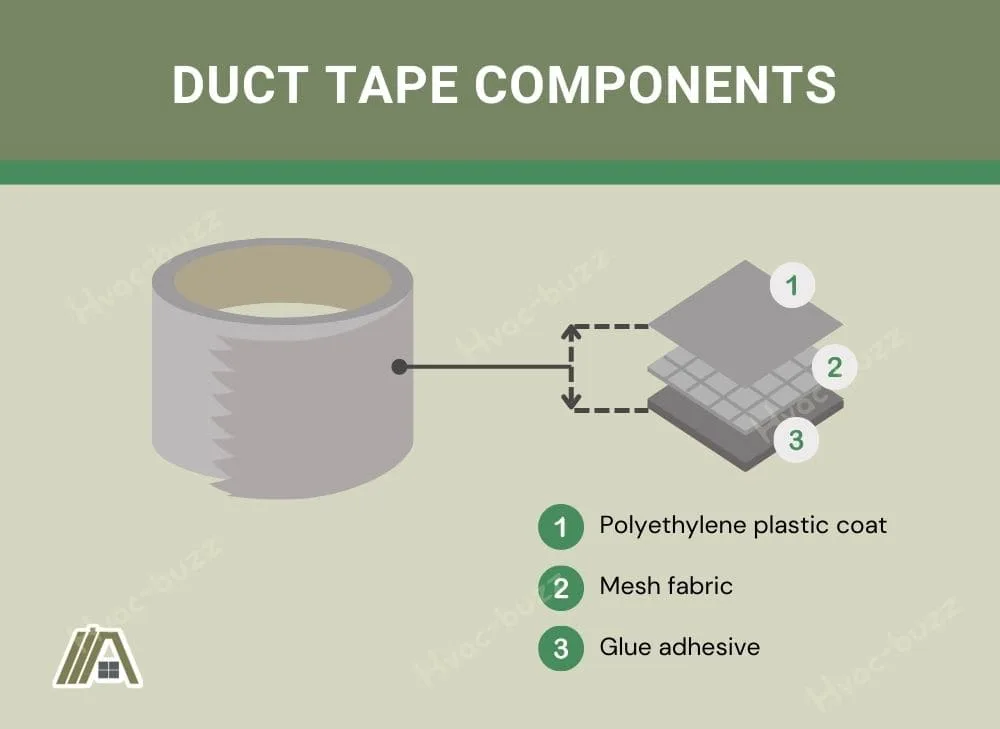
The mesh layer coating in polyethylene plastic allows duct tape to temporarily resist water penetration. However, the rubber-based adhesive is water-soluble. As time passes, the rubber-based adhesive is degraded as it diffuses into the water surrounding it.
The duct tape will eventually detach from the surface. For permanent projects that come into contact with water (such as installing a vapor barrier), duct tape is not the right option.
Instead, specially formulated sealing tape should be used as it is made with an adhesive that is water-insoluble.
Never Cover Insulation That Is Already Wet
It is never a good idea to cover insulation that is already wet. Now, the vapor barrier will keep in moisture instead of keeping it out!
If your insulation is wet, you have a few options; you may be able to let it dry before you install it, but if it is completely soaked you may need to purchase new insulation. If the insulation is not fully dry when it is installed in your home, it becomes a health hazard and structural danger.

Since the vapor barrier is made to not allow moisture to travel through it, the moisture found in the insulation will have nowhere to go.
The lack of airflow, in addition to dark, damp, and possibly warm conditions, is ideal for mold growth. Mold is a health hazard as it can lead to respiratory issues, cognitive difficulties, and organ damage.
Wet insulation is also worse at insulating your home. Energy usage and costs will increase if your insulation is filled with moisture.
Sources
https://www.energyvanguard.com/blog/insulation-does-not-stop-infiltration/
https://www.certainteed.com/insulation/fiberglass-insulation-and-vapor-barriers/