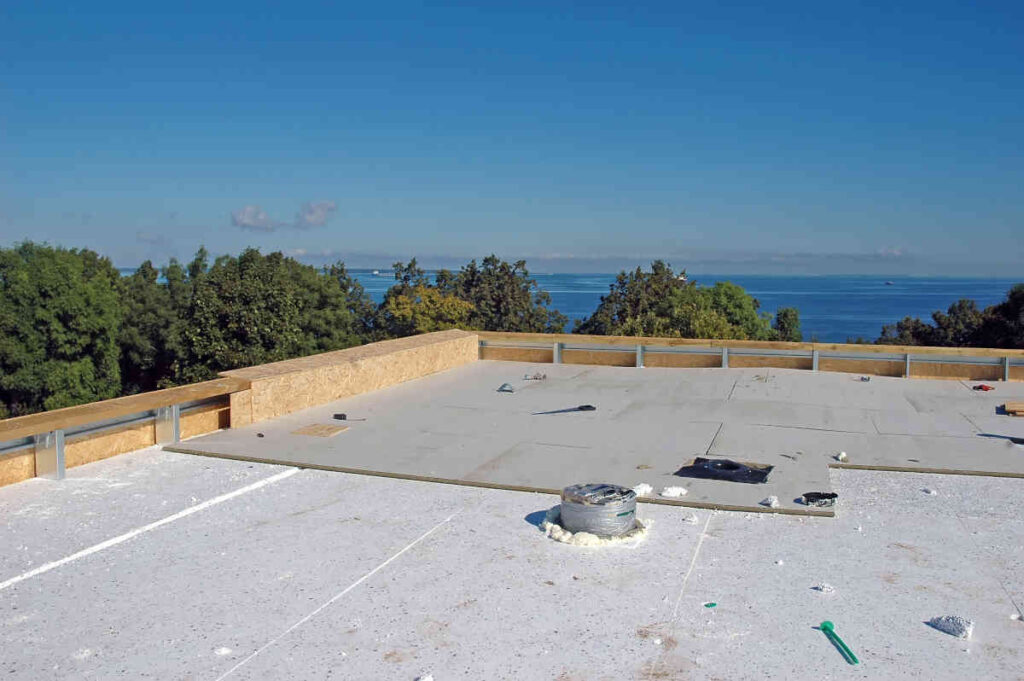
Venting a bathroom is a necessary part of your bathroom upgrade, maintenance, or improvement. Venting a bathroom through a pitched roof has its challenges but adding the dimension of a flat roof requires the job to be done perfectly to prevent any future problems. So, how do you vent a bathroom through a flat roof?
A flat roof may provide a certain visual appeal, however, you will need to give a little more thought and consideration to any activity that could potentially compromise the integrity of the roof, such as venting your bathroom fan through the roof. A small mistake during the installation could result in a very expensive water damage repair bill that the insurance will most likely not cover if the job is not done by a qualified professional.


It is possible to vent a bathroom fan through a flat roof, but this is not always the best option. The risk for leaks and subsequent problems is high, especially when done as a DIY job. Venting through the wall or hiring a professional to install the vent is preferable.
Why Is Venting a Bathroom Necessary?
The bathroom, though often one of the smallest spaces in your home, is typically the room that is subjected to the most moisture and humidity. Many bathrooms don’t have windows to provide natural ventilation. This is where mechanical ventilation as provided by a bathroom fan comes in.
Venting a bathroom is necessary to promote airflow to remove excess moisture from the space to prevent mold or mildew from taking hold in the bathroom. Removing excess moisture is not only good for health reasons but will also make your bathroom fittings, fixtures, walls, and décor last longer.
Ventilation is required in almost all types of bathrooms. Powder rooms and quarter baths can have ductless bathroom fans since the lack of a shower means that not much moisture is generated and the fan is only used to combat nasty bathroom odors.
Venting Through a Flat Roof Checklist
Before you jump into the project and try to knock it out on a Saturday afternoon, there are some crucial considerations to bear in mind when looking to install a bathroom vent on a flat roof.

- Plan properly. Don’t rush into the job without taking a good look at your roof and bathroom and conceiving a plan.
- Check local building codes. IRC R903.2 stipulates the rules for most of the US, but individual states often make adaptations that are specific to that state. Roofing codes are particular subject to adaptations as weather conditions vary greatly across the country. It’s important to know what you’re allowed to do and what regulations you need to abide by in order to avoid breaking any laws!
- Select the vent cap carefully. Take into account your local weather conditions before deciding on a cap. Rain, snow, and debris accumulating on the roof may require a specific design of external vent. Areas that get lots of snow during the winter should have roof jacks* that are at least 12 inches high.
- Waterproofing. Waterproofing is probably the most crucial part of the job to consider when venting on a flat roof. Make sure to select the right waterproofing method and materials and that you are confident you have the necessary skills to apply it correctly.
- Consider an alternate route. Venting through the roof may not be the only option. Make sure you consider all alternatives since some may present an easier and more efficient solution than going through the flat roof.
*What is a roof jack?
The roof jack or vent cap is flashing on the roof. It is usually made out of galvanized or stainless steel. It normally has a lip that will make for a waterproof seal.
How to Vent Bathroom Fan Through Flat Roof
The precise method for installing a bathroom fan vent through a flat roof will vary depending on your individual circumstances and the situation of your bathroom. Your project may require additional steps to complete the project, so we will only discuss the basic steps that would be needed to get the job done.
Recommendation: Installing a bathroom fan vent through a flat roof is a big undertaking that can have negative ramifications for your home. It is recommended that you secure the services of a professional to do the installation rather than attempting it yourself!
Source the Right Equipment
In many instances, a bathroom extractor fan and the roof vent unit may not come with ducting to route from the fan to the vent on the roof. This will then need to be purchased separately. Make sure that you source enough length and that the diameter of the ducting will fit onto the fan and the vent attachment.
Whenever the duct passes through an unconditioned space, it should be insulated to prevent condensation from forming inside the duct and dripping down from the bathroom fan.
 Roll: Walls Attics Air Ducts Windows Radiators HVAC Garages + More (16\" x 25')")
When you are researching your fan and vent, it is important to make sure that they accept the same diameter of ducting; otherwise, you will end up having to install reducers or expanders, which will complicate the job and often make the fan noisier than the quoted figure in the manual.
The type of vent that you source for your flat roof will need to have features that are suitable for the weather conditions that you typically experience throughout the year in your location.
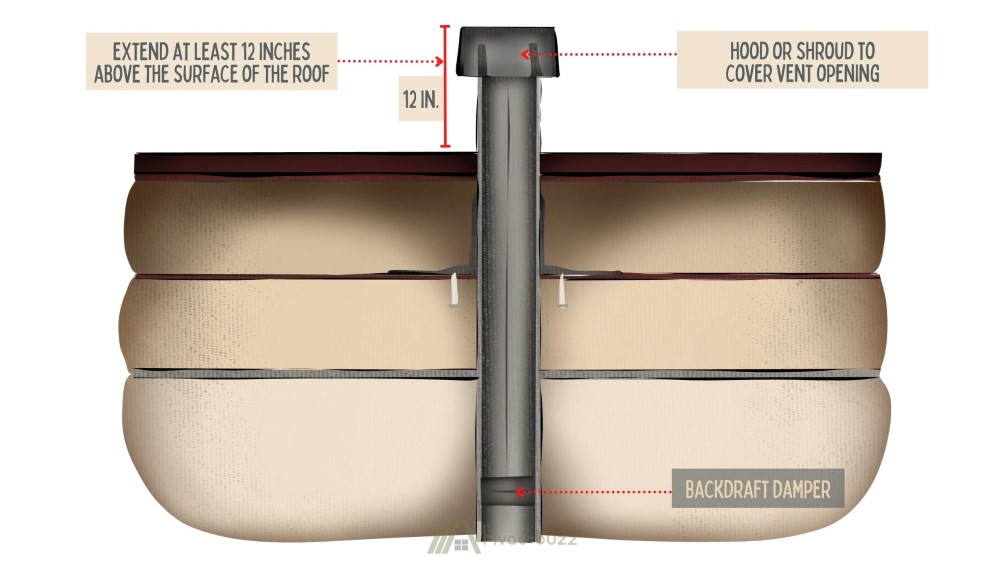
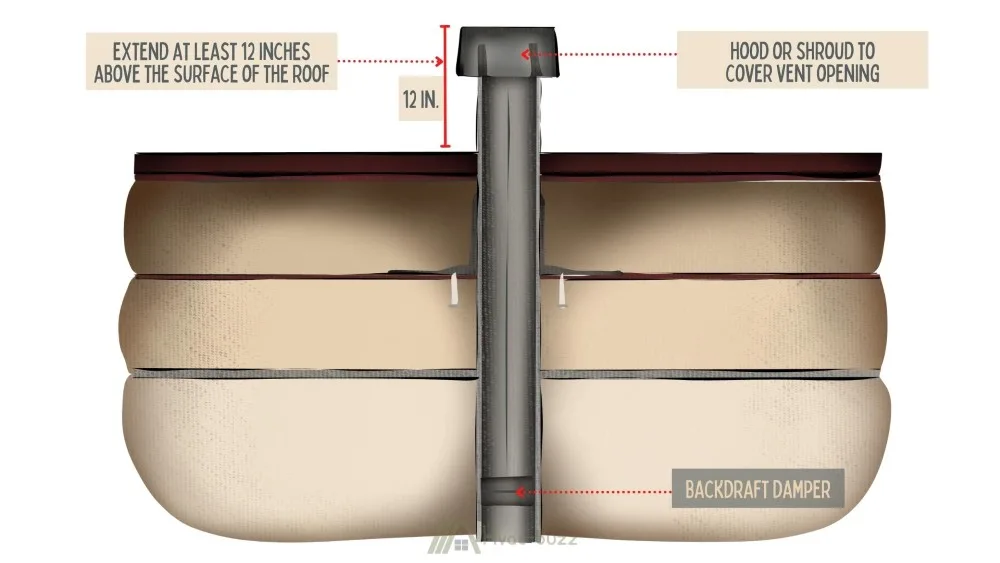
The height that the vent stands from the surface of the roof is important to cater to heavy rainfall, snowfall, and other conditions that could block the vent or cause water and debris to enter the vent and find its way into your home.
The vent should extend at least 12 inches above the surface of the roof, and it should have a hood or a shroud to cover the vent opening.
Don’t forget a quality back draft damper to protect against cold air drafting back into the house via the duct.
I recommend spring-loaded rubber-sealed dampers as they will provide an airtight seal that will keep the duct draft and insect-free.
AC infinity (amazon link) makes excellent dampers that are airtight and yet open even when using low CFM exhaust fans.
Here is a helpful guide if you would like to learn more about ventilation dampers.
Plan the Duct Route
If you can, it would be a good idea to get a look inside the ceiling to check that there are no insurmountable obstacles in the roof that you will block the route of the ducting from the fan location to the roof vent.
If you find a problem, it is easier to adapt your plan at this stage before you have already cut holes for the fan or the vent.
Cut Holes for the Extractor Fan
The fan will come with instructions as to the best method to fit the device to your bathroom ceiling or wall. Follow the instructions and cut an appropriately sized hole to accommodate the fan.
Don’t install the fan yet, but rather at this point, you can fit the ducting to the back of the fan unit. You can also make the electrical connections for the fan at this stage.
Cut the Hole in the Roof for the Vent Cap
Cut an appropriately sized hole in the roof to fit the vent. Most vent caps for a flat roof will have a base plate that will be wider than those for a pitched roof. This is to be able to better waterproof the vent after installation.
Make sure you take this wider baseplate into account when locating the vent on the roof, so there is enough space for it.
Fit the Ducting, Fan, and Vent
Feed the ducting in from the bathroom side until it protrudes through the hole in the roof. Fasten the fan in place in the bathroom. On the roof, cut the ducting to the correct length and fit it to the structure of the vent.
Secure the vent to the roof with the method that is recommended by the vent manufacturer, making sure it is secure and will not flex. If there is any play on the vent installation, this flexing could compromise any waterproofing that you place around the baseplate.
Waterproof the Vent
Waterproofing is the most important thing to get right as this step will help to prevent future problems with the vent installation. If the waterproofing of the vent installation on the roof is not done correctly, it may result in extensive damage to the roof and your home and require expensive repairs down the road.
The type of waterproofing that you use will be determined by what the best product is for your weather conditions. Certain products are better for cooler climates, and others are better for hot, sunny climates, and using substandard materials could determine the success or failure of the entire job.


Different vent caps and roof materials require different sealants and methods. Make sure you consult the roof cap manual before installing!
There Is High Probability of Leaks on a Flat Roof
Flat roofs may look visually appealing, but they come with many potential pitfalls that could cause a problem for your home. The following are the main issues with a flat roof that you need to be aware of.
- High maintenance. A flat roof requires more frequent care and maintenance than other roof types, and the maintenance is usually more costly and time-consuming than on other roof styles.
- Leaks. Because the flat roof can potentially result in pooling water and the sealing of the roof is difficult, there is a high probability of leaks developing over time and with any repairs or modifications done to the roof.
- Repairs are difficult. Once a leak has developed on a flat roof, it can cause a lot of damage, be difficult to trace, and also be difficult to repair.
What these points emphasize is that if you want to do your bathroom vent installation as a DIY project, then you need to be absolutely confident of your skills to install the vent and to adequately seal both the vent and the roof once the vent has been fitted.
Flat roof venting poses an increased risk of leaking, and water intrusion has been reported to make up about 40% of all building-related issues.
To be better prepared, here are three primary causes that tend to cause a majority of these inconveniences.
Leaks Due to Ponding
Ponding refers to water that pools up on the surface of a roof and remains for over two days. It’s seen as the most common cause of roofing problems and thus is a major downfall to a flat roofing system whose horizontal nature can often encourage it. This is why roofing is typically designed and placed with a very slight slope, leading to drainage placements.

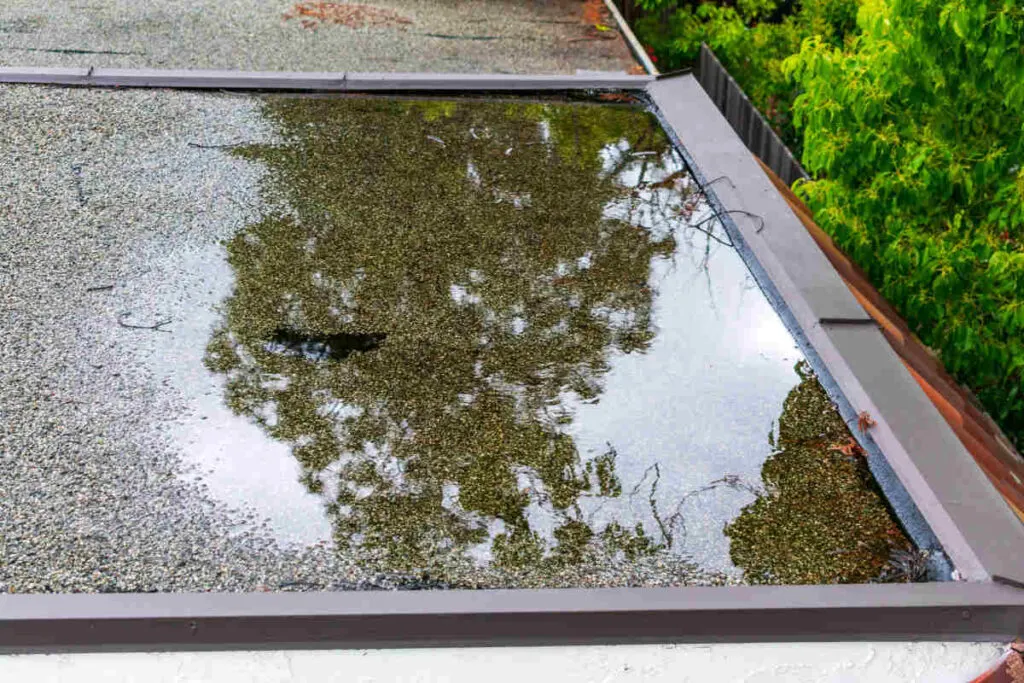
Ponding is bound to happen when roofing drains have become overwhelmed with excess amounts of debris. As flat roofs are more likely to collect debris as well as water, one problem compounds the other.
Drainage components, such as gutters and downspouts, which can become blocked, may result in ponding. On the other hand, installing gutters may improve drainage if they are well maintained.
Related article: Why Gutters Make Noise When Windy (Learn how to stop it)
Another note is the likelihood of ponding around A/C units and water tanks, which take up a lot of roof space. Large pools of water can weigh down on roofing, which slightly dents roofing structures and creates space for still more water to collect in.
Leaks From Structures Through the Roof
Similar to the typical sloped shingle roof found in residential construction, flat roofs are vulnerable to leaks where an in-home structure (such as a bathroom fan vent) rises through the roof’s surface. Not only do you have the problem of the actual leak, but you also have to contend with potentially moisture-sensitive fixtures being exposed to water.
Some protective measures for avoiding this scenario are flashing installation, as previously mentioned, and rain collars to keep rain and melted snow from entering through venting. Roof boots are fitting for residential projects and can cover vent pipes to seal any openings from water to leak into.
Rubber Roofing Leaks
Modern roofing has taken a recent liking to single-ply pieces of durable rubber, otherwise called roofing membranes, rather than the traditional use of tar, gravel, and roof felt. As these membranes are quite thin and aren’t difficult to install, they are also cost-effective.
The weatherproofing ability of these membranes is effective, however, they are bound to experience wear and tear. This can be identified by cracks in the rubber and noticeable holes which lead to leaks that reach the insulation layer beneath the roofing membrane. The worst-case scenario is to find waterlogged insulation, which extends damage by multiplying the presence of leaks.
Consider Venting Through the Wall Instead
If you are intent on doing your bathroom vent project yourself, then you may want to consider an option that is less fraught with potential disaster.
An alternative to venting through the roof can be to vent the bathroom through the wall instead. This method is less likely to result in a leak, and you don’t have to mess with the integrity of your roof.


If the situation of your bathroom lends itself to venting through a wall rather than the roof, then it would most certainly be a much simpler project than going through the flat roof, and you should seriously consider this alternative.
Sources
https://codes.iccsafe.org/content/IRC2018/chapter-31-vents
https://codes.iccsafe.org/content/IRC2018/chapter-9-roof-assemblies